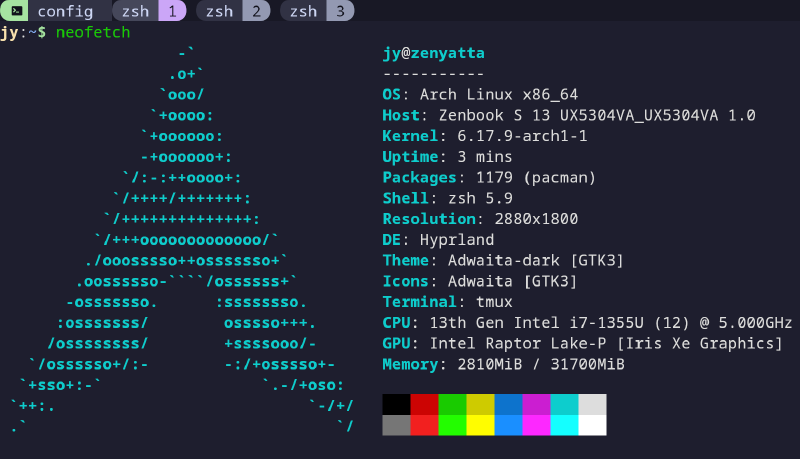
This weekend I had nothing planned, so I decided to install Arch Linux on my Zenbook 13 laptop, to get one step closer to a full-time Linux user.
I’ve been using Arch with Hyprland as my daily driver on my desktop PC, but this would be my first time dealing with a laptop install, and also, dual booting with Windows.
The sad truth is that some softwares out there are still Windows-only, so having access to at least one Windows installation is a must for me.
Environment
- Laptop: Zenbook S 13 UX5304VA_UX5304VA 1.0
- OS: Windows 11 Home
- USB stick: A random stick I had with Arch ISO burned on it
Allocate disk space
To make some space for Arch, I first booted into Windows and used Disk Management to shrink the main partition. This is what it ended up like:
1
2
3
4
5
6
7
8
9
|
jy@zenyatta:~$ lsblk
NAME        MAJ:MIN RM   SIZE RO TYPE MOUNTPOINTS
nvme0n1     259:0    0 953.9G  0 disk
├─nvme0n1p1 259:1    0   100M  0 part
├─nvme0n1p2 259:2    0    16M  0 part
├─nvme0n1p3 259:3    0 484.1G  0 part
├─nvme0n1p4 259:4    0   890M  0 part
├─nvme0n1p5 259:5    0    32G  0 part [SWAP]
└─nvme0n1p6 259:6    0 436.8G  0 part /
|
(Forgot to take a screenshot on Windows side)
Boot into Arch live environment
The BIOS key for my Zenbook turned out to be F2 or DEL.
So I plugged in my Arch installer USB stick and rebooted the laptop, while holding down F2.
To reliably get to BIOS with reboot, start holding down F2 or DEL before Windows’ “shutting” display disappears, and hold it all the way to BIOS.
In the BIOS menu:
- Hit F7 to go to advanced
- Change Boot option to prioritize USB drive
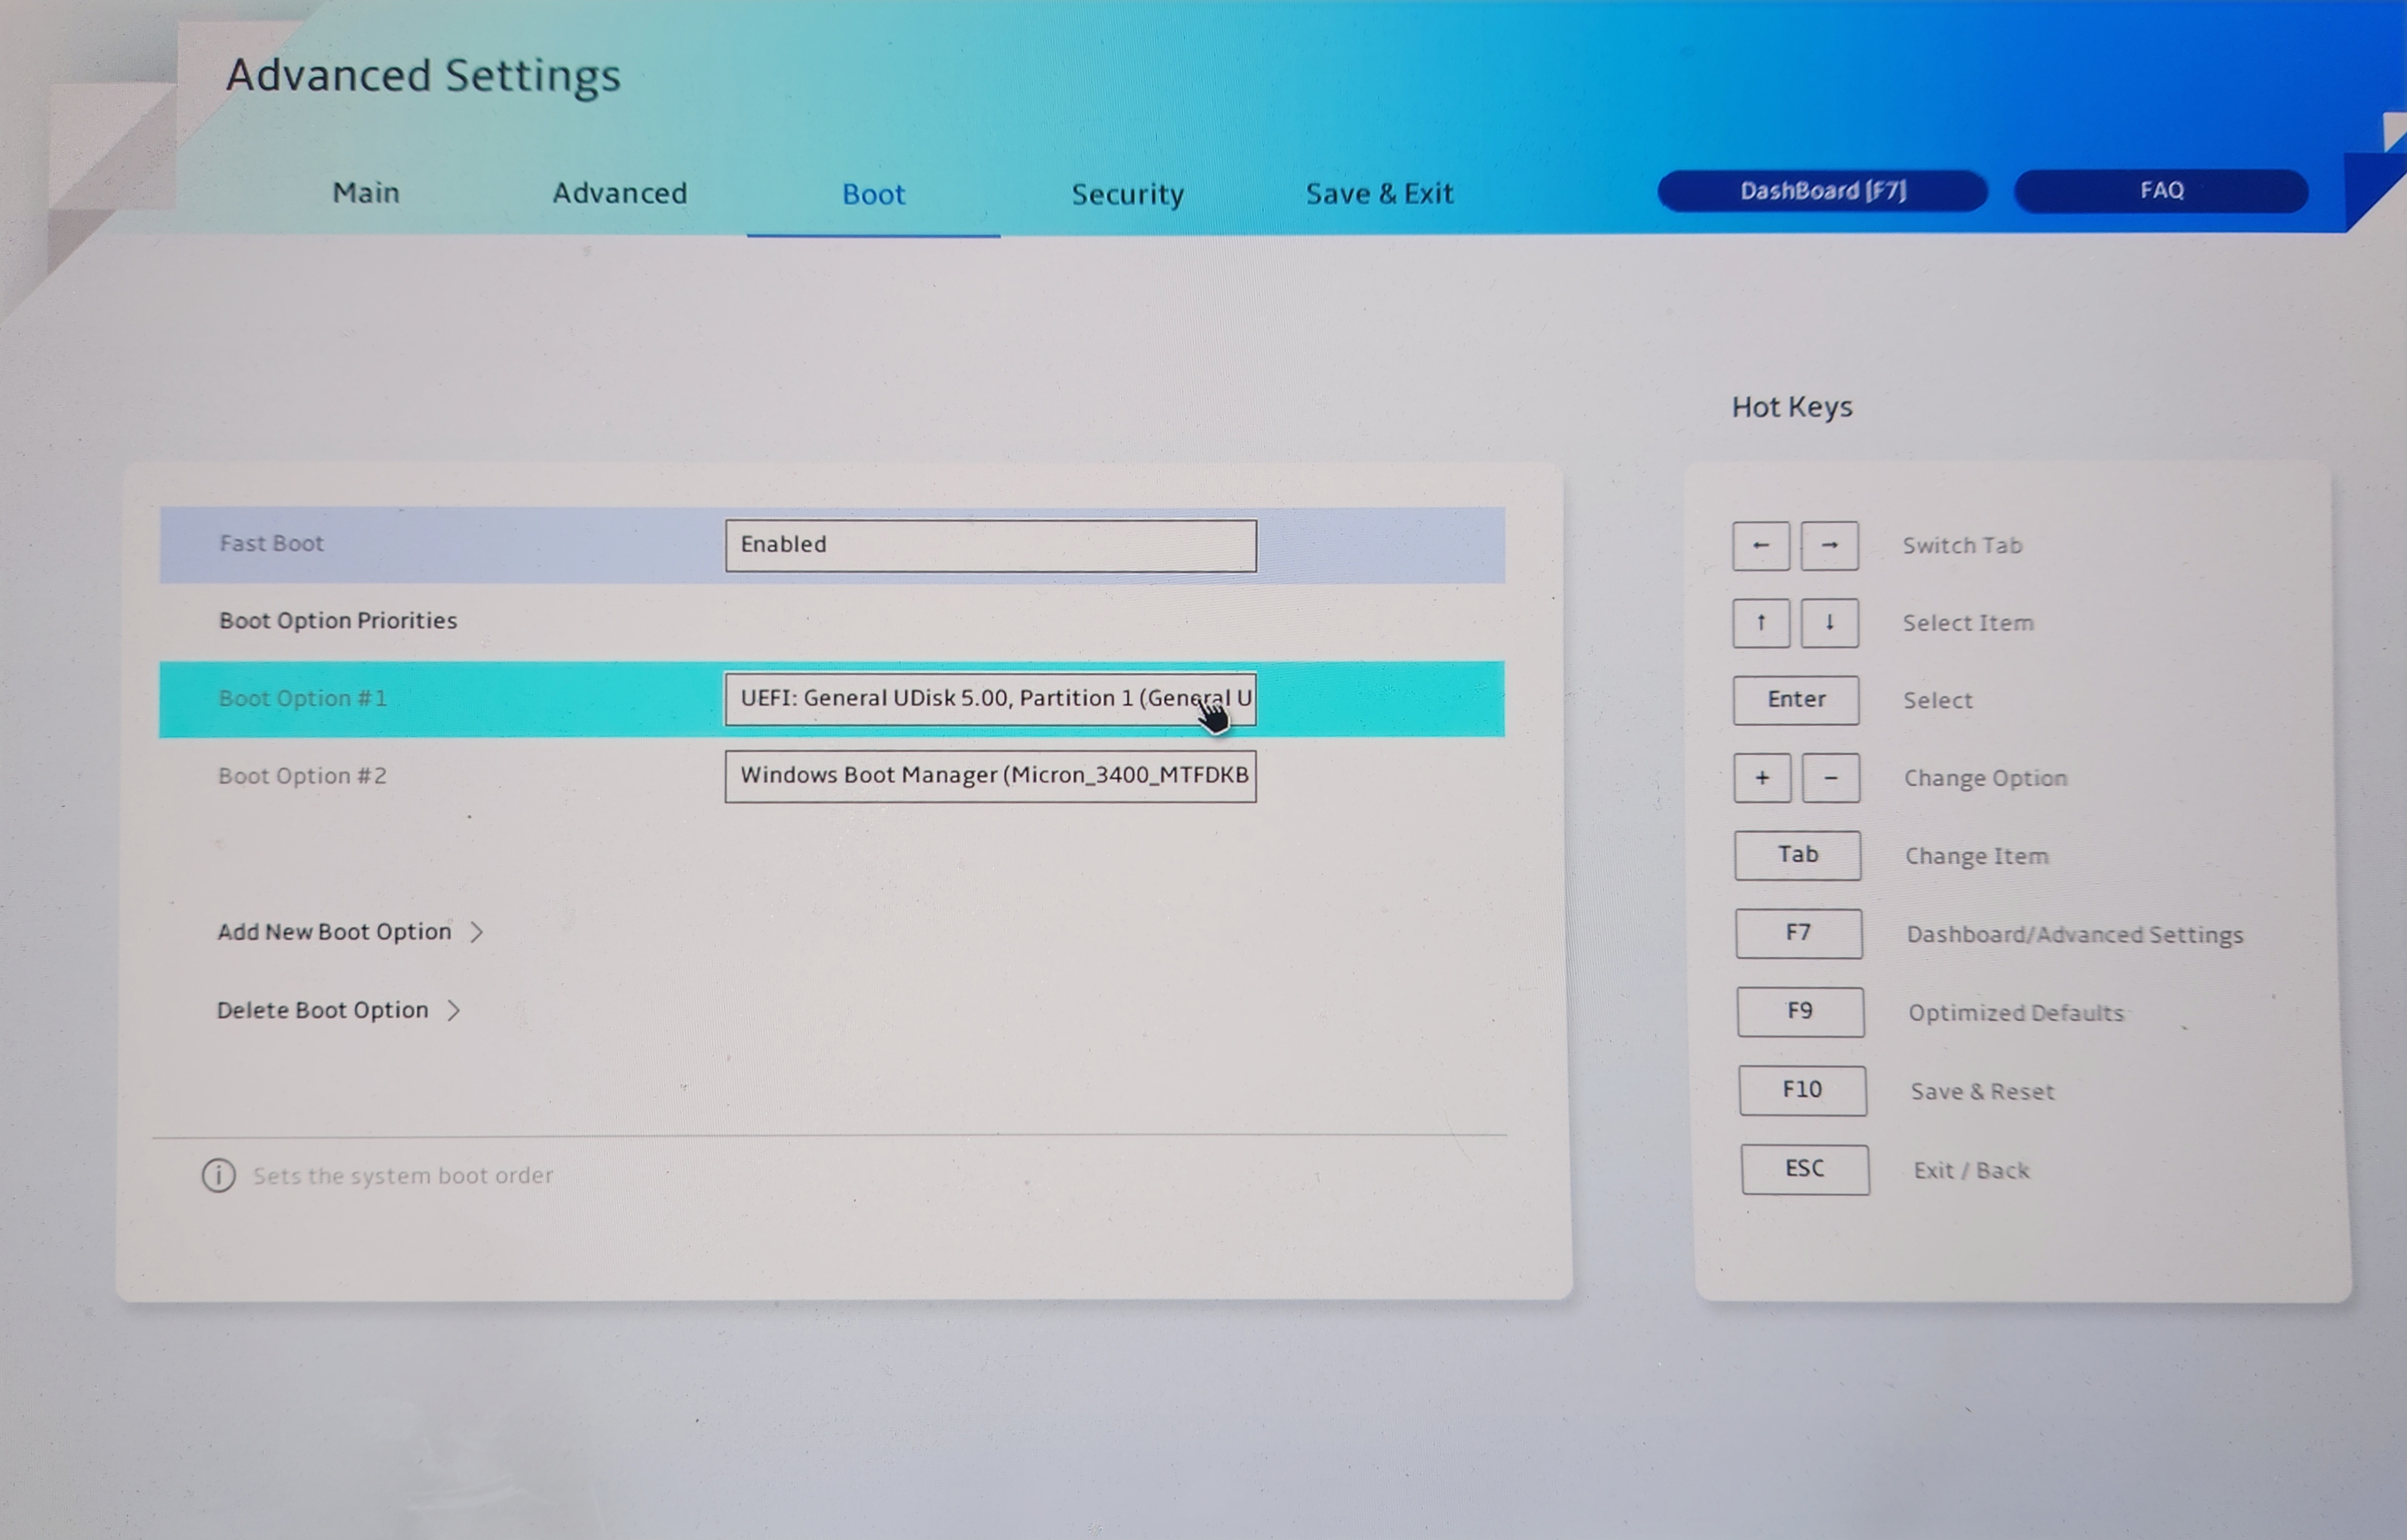
- Hit F10 to save and reset into live environment
Set up SSH in live environment
Before getting into the installation process, I wanted to try something new: running the installation process over SSH from my desktop. This would allow me to copy-paste a lot of things from online guides and my notes, making the process much smoother.
Since the Arch live environment has sshd enabled by default, all I had to do was set up a root password and connect it to wifi (with iwd which is also available in the live environment).
Starting off with root password,
Then connecting to WiFi with iwd
1
2
3
4
5
6
|
iwctl

station list
station wlan0 scan
station wlan0 get-networks
station wlan0 connect <SSID>
|
At this point I had an IP
1
2
3
4
5
6
|
$ ip a
...
2: wlan0: <BROADCAST,MULTICAST,UP,LOWER_UP> mtu 1500 qdisc noqueue state UP group default qlen 1000
    link/ether b0:3c:dc:7e:84:93 brd ff:ff:ff:ff:ff:ff
    inet 10.0.0.6/8 brd 10.255.255.255 scope global dynamic noprefixroute wlan0
       valid_lft 5235sec preferred_lft 5235sec
|
So I just ssh’ed into it from my desktop:
Pre-chroot
As always, I followed the Arch installation guide.
First step was to partition the disk with fdisk.
fdisk /dev/nvme0n1
 1
 2
 3
 4
 5
 6
 7
 8
 9
10
11
12
13
14
15
16
17
18
19
20
21
22
23
24
25
26
27
28
29
30
31
32
33
34
35
36
37
38
39
40
41
42
43
44
45
46
47
48
49
50
51
52
53
54
55
56
57
58
59
60
61
62
|
root@archiso ~ # fdisk /dev/nvme0n1

Welcome to fdisk (util-linux 2.41.2).
Changes will remain in memory only, until you decide to write them.
Be careful before using the write command.

Command (m for help): p
Disk /dev/nvme0n1: 953.87 GiB, 1024209543168 bytes, 2000409264 sectors
Disk model: Micron_3400_MTFDKBA1T0TFH
Units: sectors of 1 * 512 = 512 bytes
Sector size (logical/physical): 512 bytes / 512 bytes
I/O size (minimum/optimal): 512 bytes / 512 bytes
Disklabel type: gpt
Disk identifier: 0A408F3B-9A61-44EE-8FD8-1609620097FD

Device              Start        End    Sectors   Size Type
/dev/nvme0n1p1       2048     206847     204800   100M EFI System
/dev/nvme0n1p2     206848     239615      32768    16M Microsoft reserved
/dev/nvme0n1p3     239616 1015543807 1015304192 484.1G Microsoft basic data
/dev/nvme0n1p4 1998583808 2000406527    1822720   890M Windows recovery environment
/dev/nvme0n1p5 1015543808 1998583807  983040000 468.8G Linux filesystem

Partition table entries are not in disk order.

Command (m for help): n
Partition number (5-128, default 5):
First sector (1015543808-2000409230, default 1015543808):
Last sector, +/-sectors or +/-size{K,M,G,T,P} (1015543808-1998583807, default 1998583807): +32G

Created a new partition 5 of type 'Linux filesystem' and of size 32 GiB.

Command (m for help): t
Partition number (1-5, default 5):
Partition type or alias (type L to list all): 19

Changed type of partition 'Linux filesystem' to 'Linux swap'.

Command (m for help): n
Partition number (6-128, default 6):
First sector (1082652672-2000409230, default 1082652672):
Last sector, +/-sectors or +/-size{K,M,G,T,P} (1082652672-1998583807, default 1998583807):

Created a new partition 6 of type 'Linux filesystem' and of size 436.8 GiB.

Command (m for help): p
Disk /dev/nvme0n1: 953.87 GiB, 1024209543168 bytes, 2000409264 sectors
Disk model: Micron_3400_MTFDKBA1T0TFH
Units: sectors of 1 * 512 = 512 bytes
Sector size (logical/physical): 512 bytes / 512 bytes
I/O size (minimum/optimal): 512 bytes / 512 bytes
Disklabel type: gpt
Disk identifier: 0A408F3B-9A61-44EE-8FD8-1609620097FD

Device              Start        End    Sectors   Size Type
/dev/nvme0n1p1       2048     206847     204800   100M EFI System
/dev/nvme0n1p2     206848     239615      32768    16M Microsoft reserved
/dev/nvme0n1p3     239616 1015543807 1015304192 484.1G Microsoft basic data
/dev/nvme0n1p4 1998583808 2000406527    1822720   890M Windows recovery environment
/dev/nvme0n1p5 1015543808 1082652671   67108864    32G Linux swap
/dev/nvme0n1p6 1082652672 1998583807  915931136 436.8G Linux filesystem

Partition table entries are not in disk order.
|
Essentially I created a 32GB swap partition and a root partition with the rest of the space. The 32GB swap is just there in case I want to experiment with hibernation later on.
Then,
Create filesystems
1
2
3
|
mkfs.ext4 /dev/nvme0n1p6
mkswap /dev/nvme0n1p5
swapon /dev/nvme0n1p5
|
Mount filesystems
1
2
|
mount /dev/nvme0n1p6 /mnt
mount /dev/nvme0n1p1 /mnt/boot # EFI partition
|
The EFI partition was already created and used by the existing Windows installation, so I could just mount it directly without formatting.
Since Windows bootloader does not allow adding a new entry for Linux, a new systemd-boot directory will be created here later for the new boot loader.
Initialize Arch filesystem and install packages
1
2
3
4
|
pacstrap -K /mnt base linux linux-firmware \
  networkmanager iwd \
  base-devel git vi vim sudo openssh \
  man-db man-pages
|
Chroot
Then it was time to
and
set up date time,
1
2
3
4
|
ln -sf /usr/share/zoneinfo/Area/Location /etc/localtime
hwclock --systohc
locale-gen
echo "LANG=en_US.UTF-8" > /etc/locale.conf
|
set up hostname,
1
|
echo "zenyatta" > /etc/hostname
|
and set up root password again for the actual new installation.
Bootloader
While in chroot, I also configured the bootloader.
This is the part slightly different from the usual desktop installations, since I wanted to dual boot with Windows.
systemd-boot still allowed me to configure everything quite easily.
Then I created two entries, one for Arch and one for Windows.
 1
 2
 3
 4
 5
 6
 7
 8
 9
10
11
12
13
|
# arch entry
cat << EOF > /boot/loader/entries/arch.conf
title Arch
linux /vmlinuz-linux
initrd /initramfs-linux.img
options root=UUID=<part_uuid> rw
EOF

# windows entry
cat << EOF > /boot/loader/entries/windows.conf
title Windows
efi /EFI/Microsoft/Boot/bootmgfw.efi
EOF
|
<part_uuid> comes from the Linux partition found with
Then I created the loader configuration:
1
2
3
4
5
6
|
cat << EOF > /boot/loader/loader.conf
default @saved
timeout 4
console-mode max
editor no
EOF
|
I chose to save the last selected entry as default. It might be handy when I have to use Windows from time to time.
Boot into the new system
The live environment part was done, so I went back into BIOS to change the default bootloader.
ctrl+D,
Then held down F2 to go into BIOS.
This time,
- F7 for advanced
- Add a new boot option
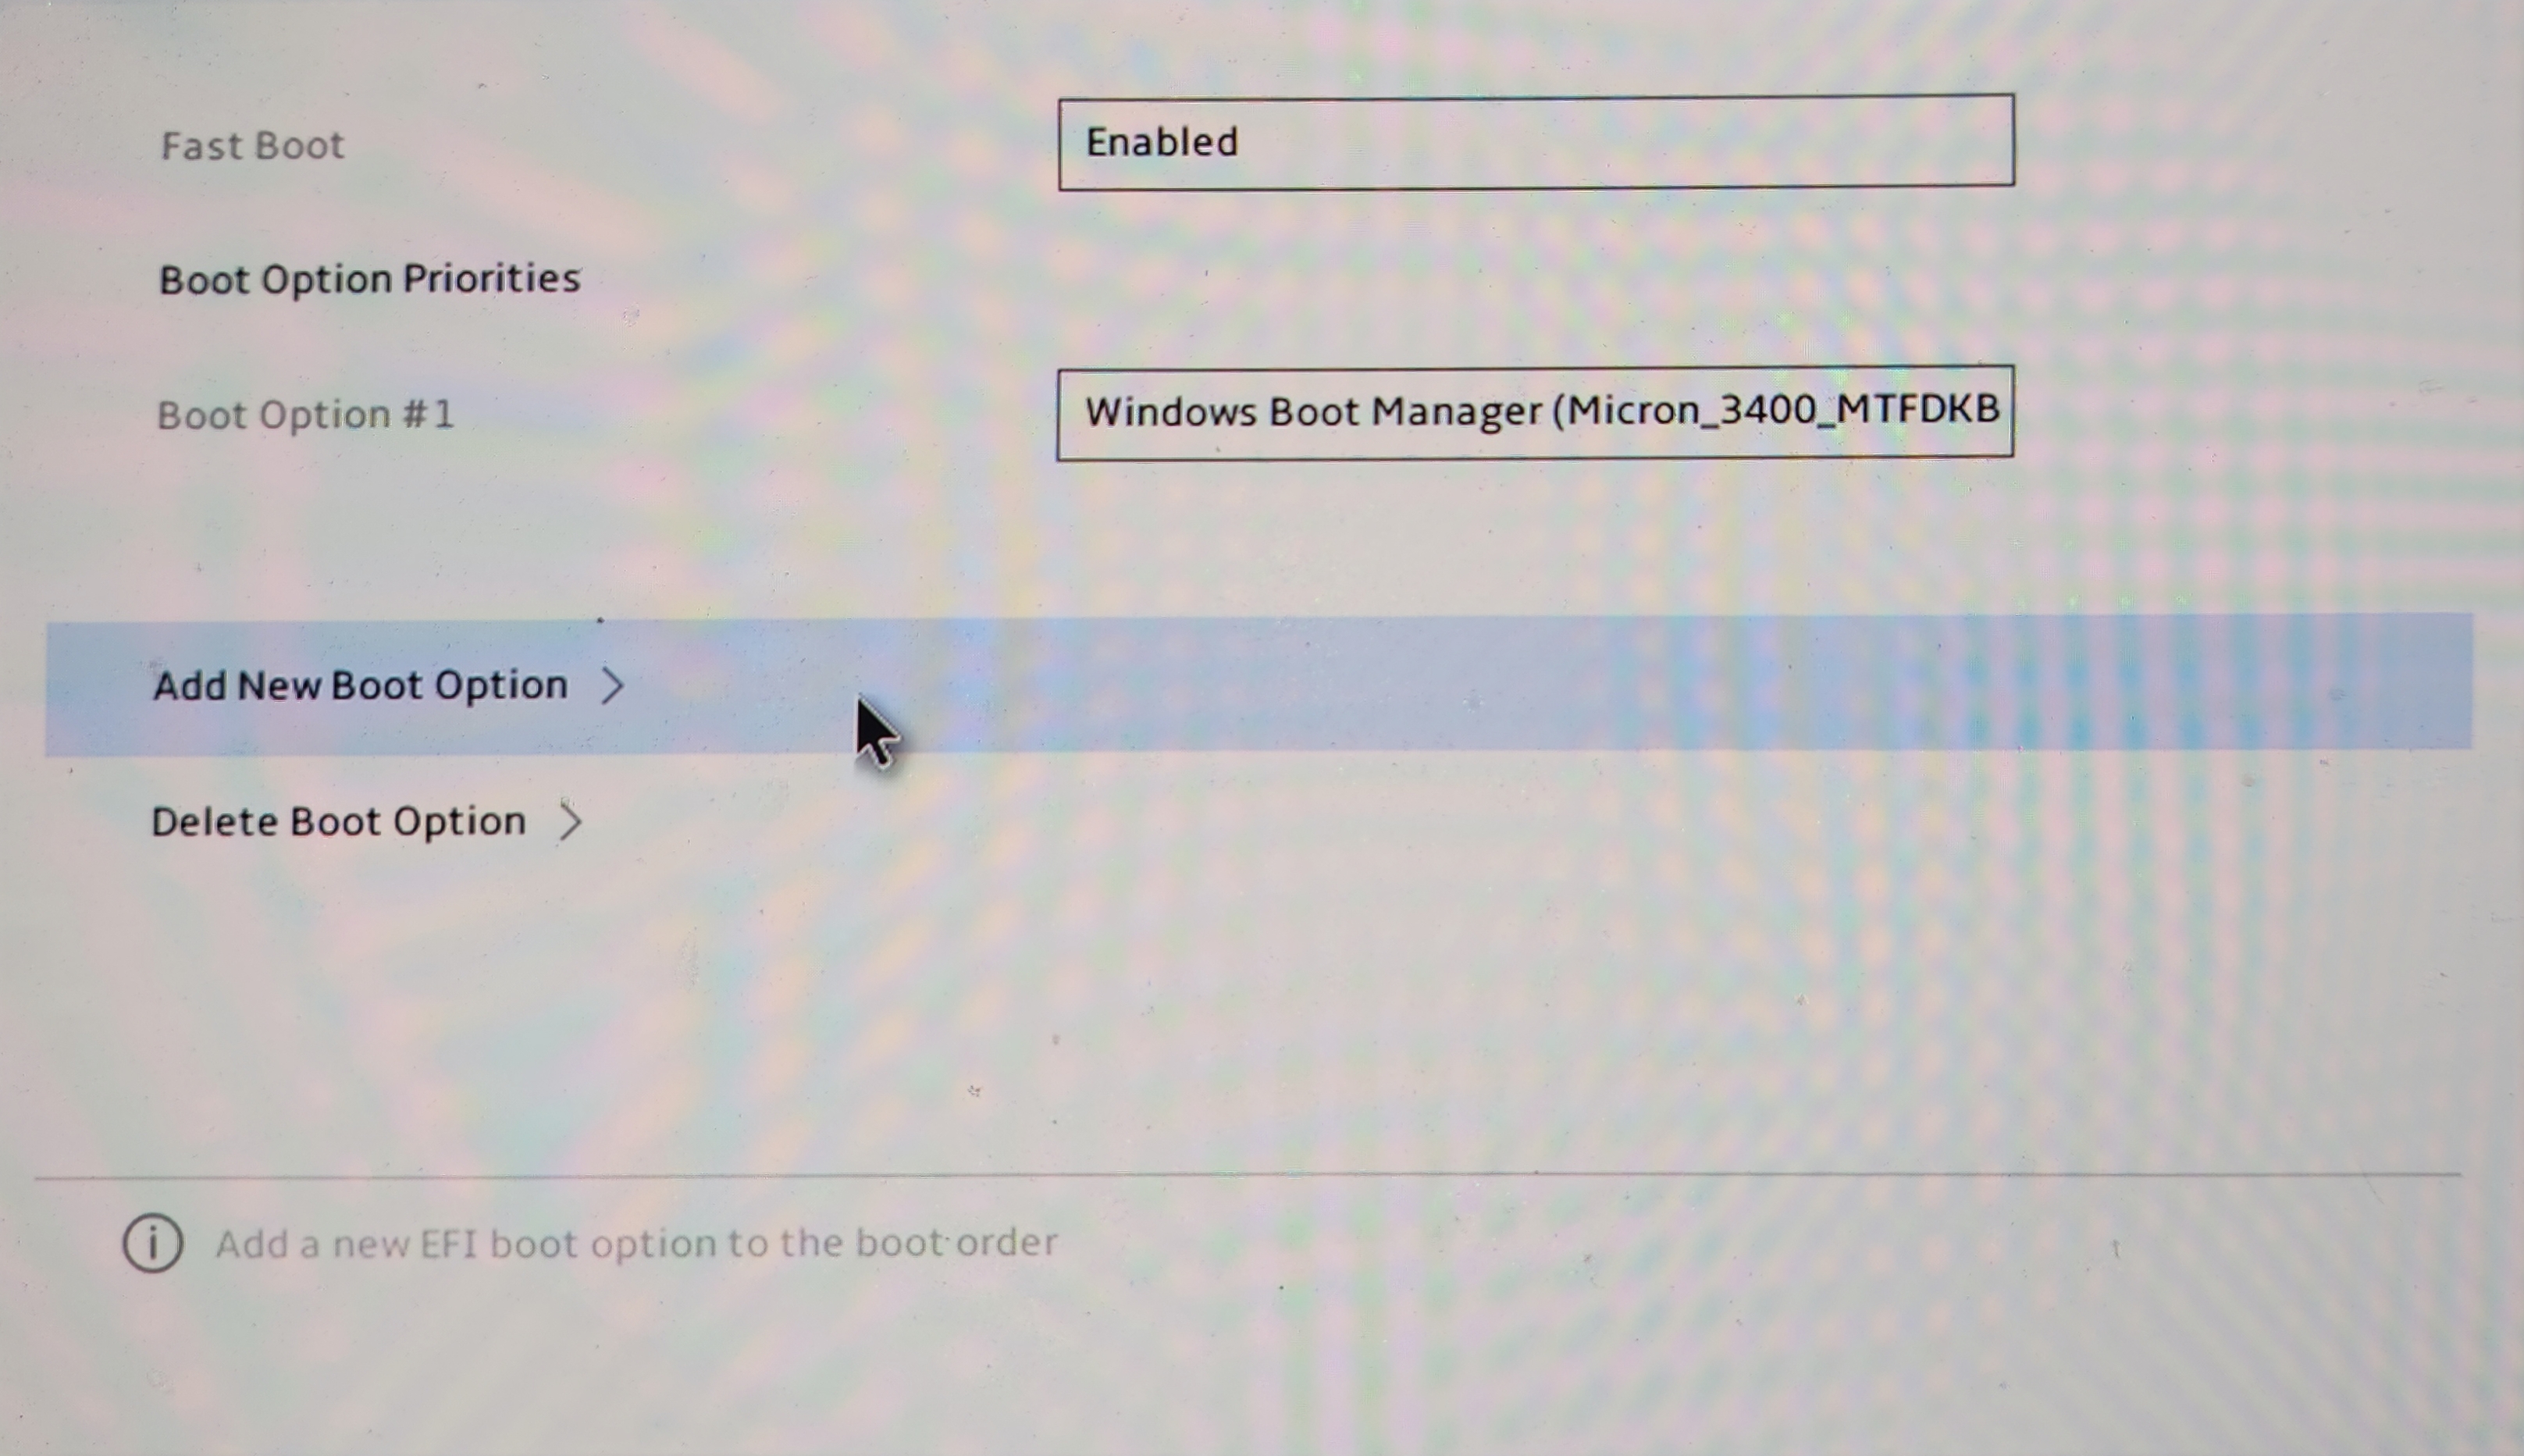
- Give it a name (e.g. “systemd”) and set the path to
\EFI\systemd\bootx64.efi
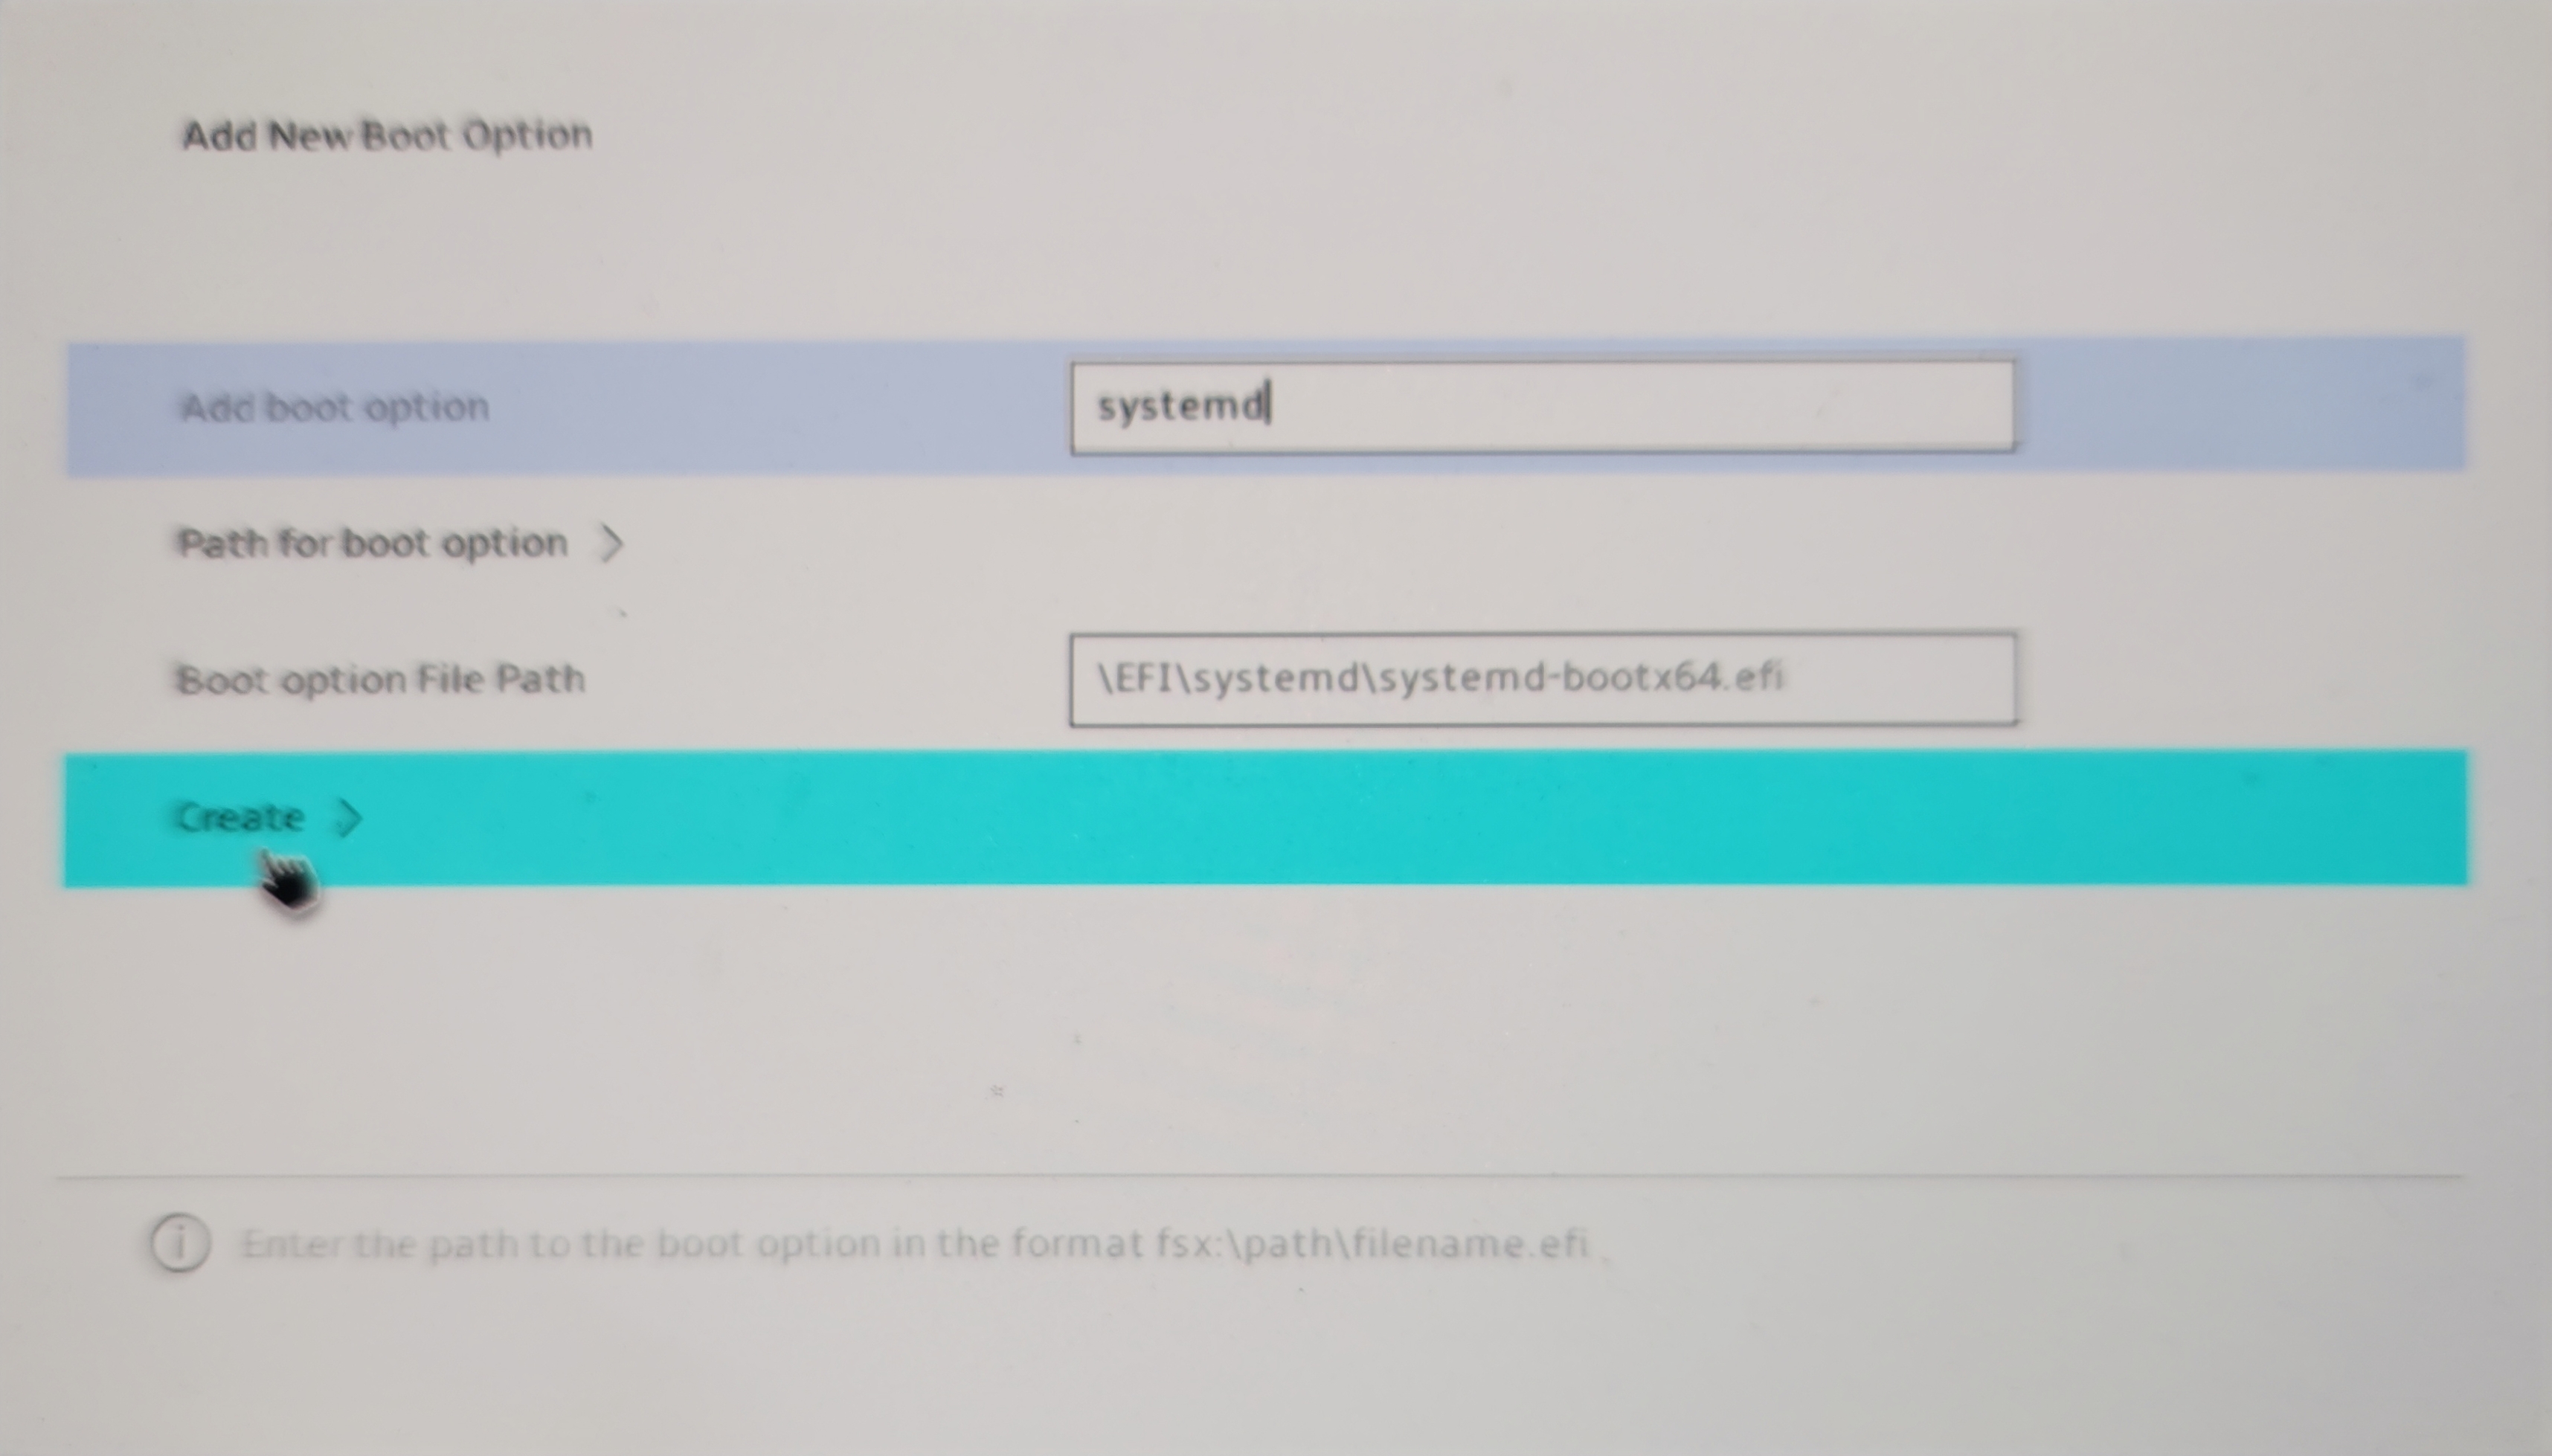
- Create, and make sure to prioritize this new option
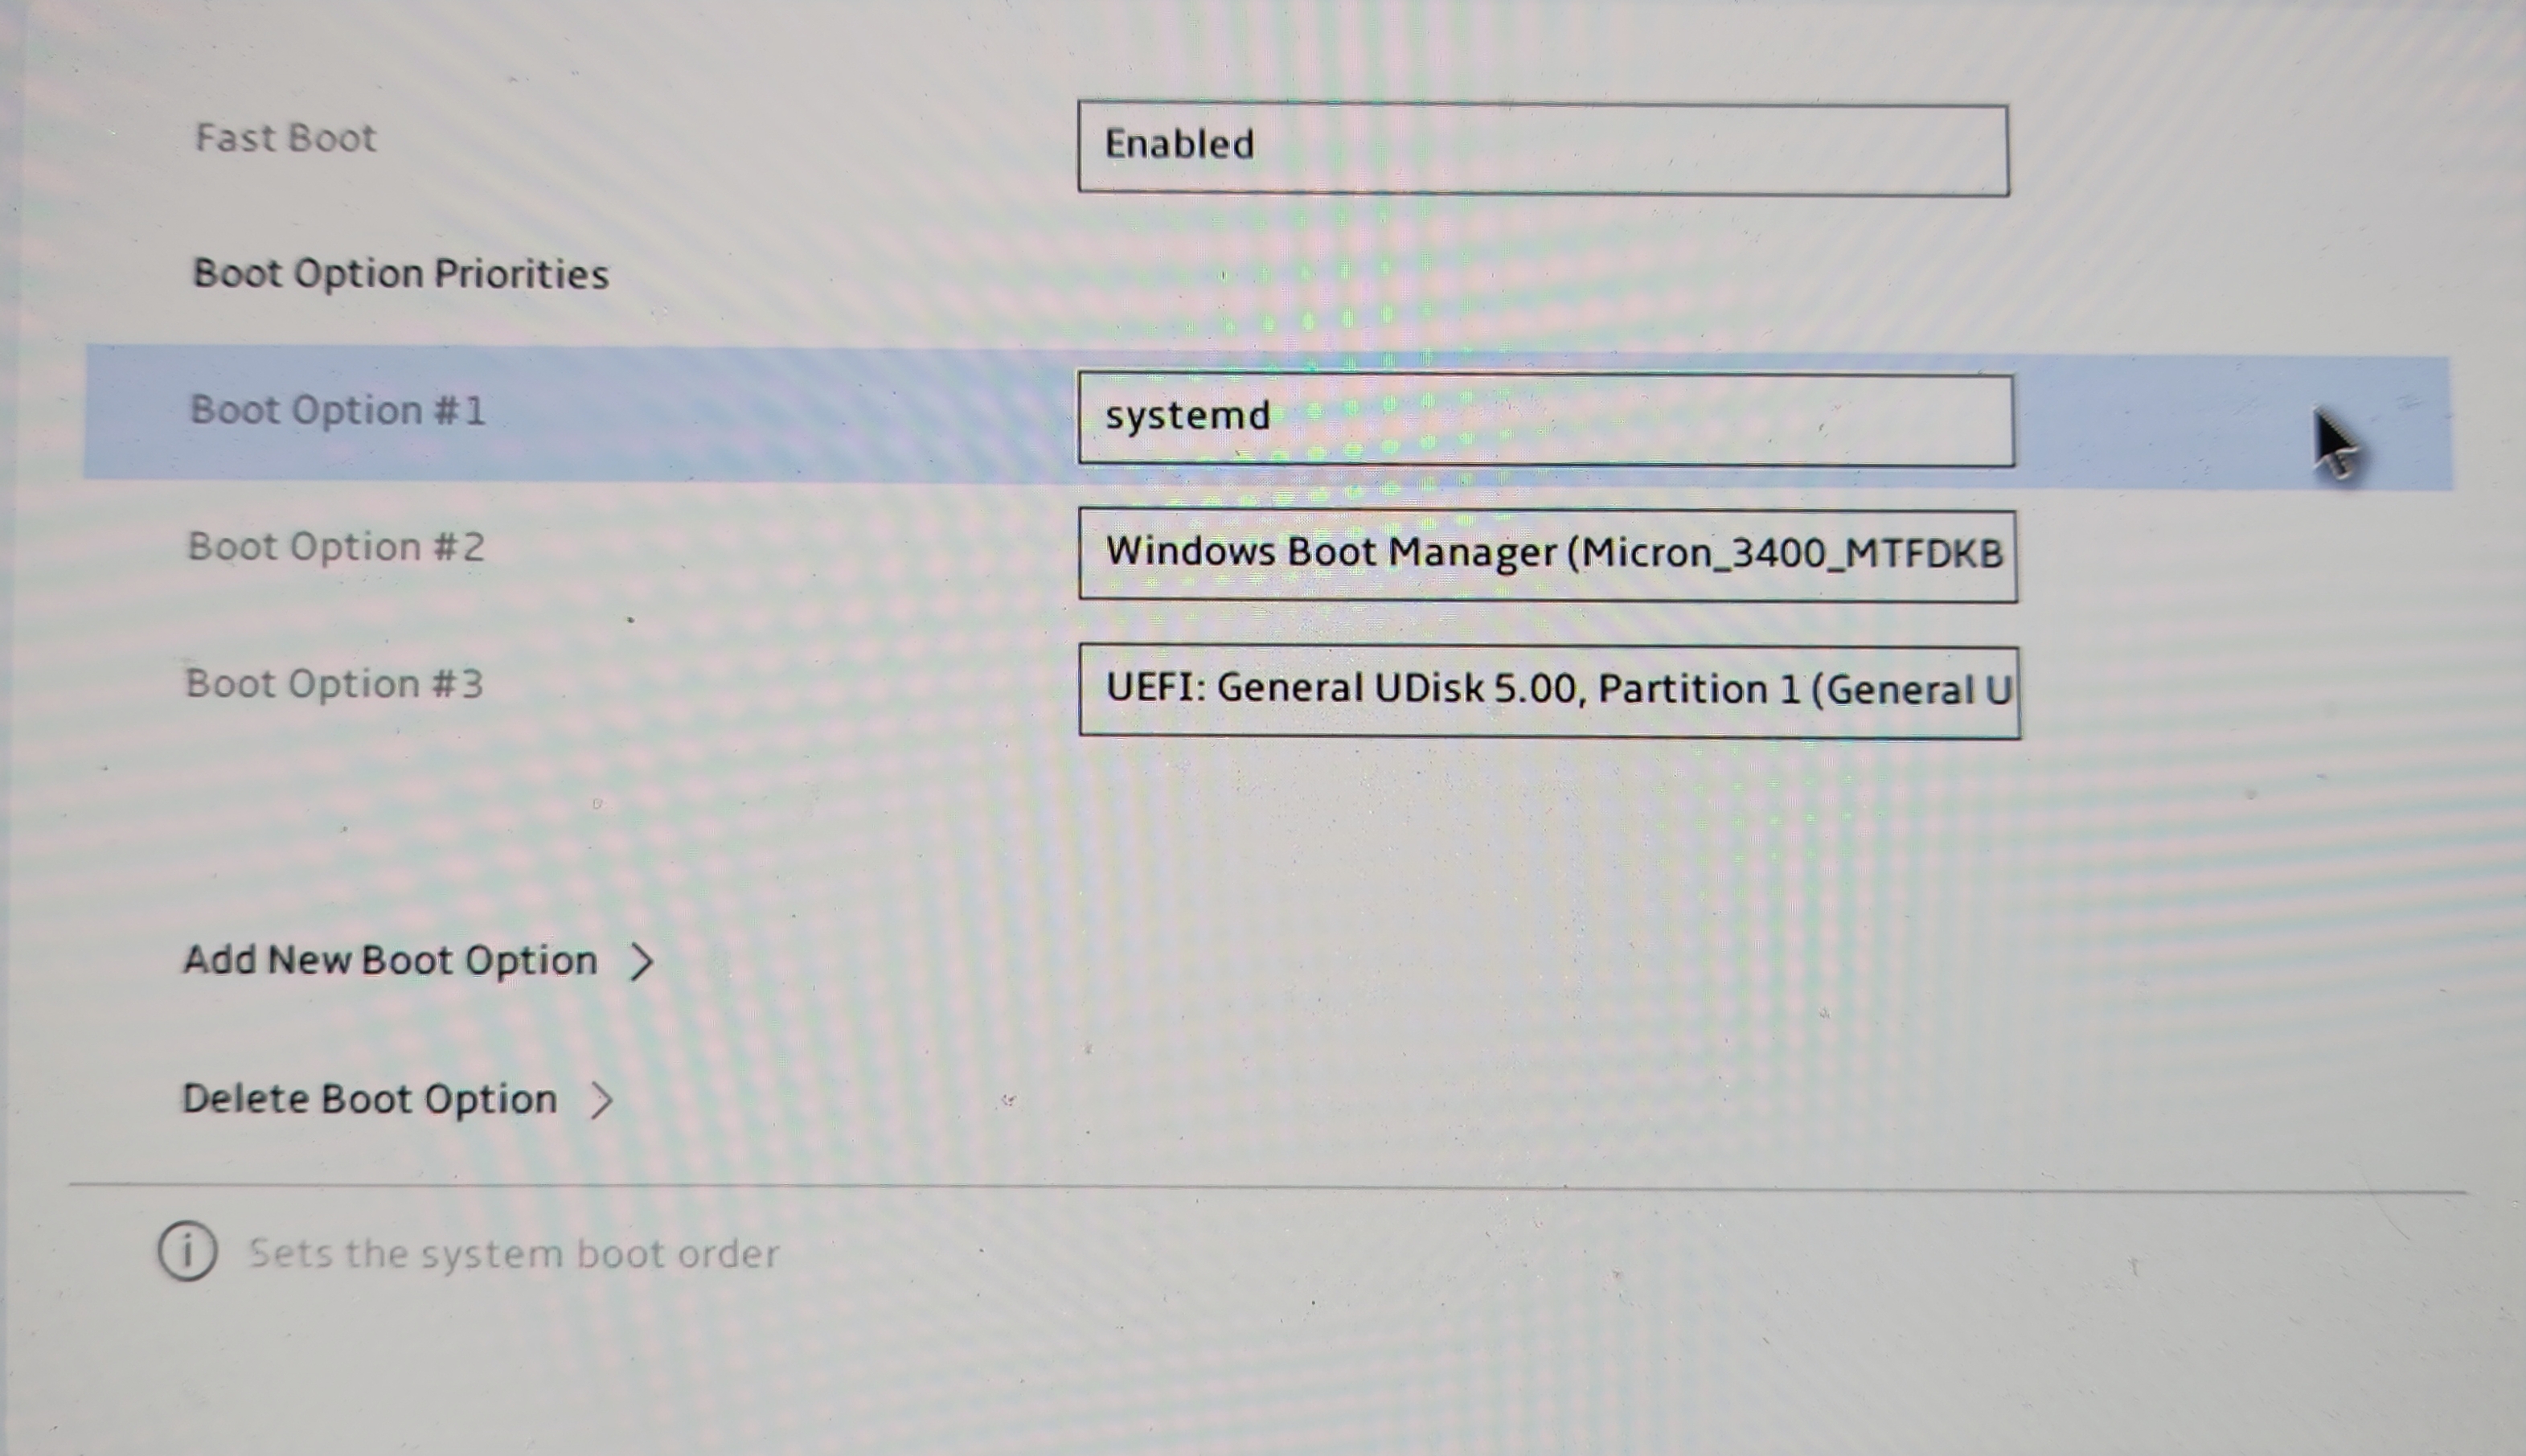
- F10 to save and reboot
And it took me to the systemd-boot menu.
Set up SSH on new system
This is a fresh Arch installation, so there are still a few things to do.
First, network.
1
2
3
|
systemctl enable --now NetworkManager
nmcli device wifi list
nmcli device wifi connect "<SSID>" password "<password>"
|
Next, set up SSH server to work from my desktop again.
1
|
systemctl enable --now sshd
|
Before using SSH, though, I set up my own user account with sudo privileges. Didn’t want to allow root login over SSH.
1
2
3
4
5
6
|
useradd -m jy
groupadd sudo
usermod -aG sudo jy

visudo
# uncomment the line `%sudo ALL=(ALL:ALL) ALL` granting sudo privileges to sudo group
|
Now from my desktop, I could
Seasoning
The setup is not done without bringing my dotfiles and packages onboard.
First, locale preferences needs to be generated
1
2
3
4
|
sudo vim /etc/locale.gen
# Find and uncomment: en_US.UTF-8 UTF-8
sudo locale-gen
export LANG=en_US.UTF-8 # for the current session
|
Then I wanted to clone my dotfiles from GitLab, but that required a temporary SSH key.
1
2
|
ssh-keygen
cat ~/.ssh/id_ed25519.pub
|
I added the public key to my GitLab account, then cloned the repos:
- linux_config: Linux package configs, including zsh, Hyprland, Neovim, etc.
- private_config: things like SSH keys, tokens, etc.
1
2
3
4
|
cd
mkdir git && cd git
git clone --recurse-submodules git@git.junyi.me:dot/linux_config.git
git clone --recurse-submodules <private_config_repo_url>
|
At this point I removed the temporary SSH key from my GitLab account.
Removed existing configs and applied my dotfiles with stow
1
2
3
4
5
6
|
rm -r ~/.ssh ~/.bashrc
sudo pacman -S make stow
cd private_config
make home
cd ../linux_config
make user
|
Then installed packages from my package lists.
1
2
|
cd pkgs
sudo pacman -S --needed - < arch_home_pkglist-repo.txt
|
Selected package providers
 1
 2
 3
 4
 5
 6
 7
 8
 9
10
11
12
13
14
15
|
:: There are 2 providers available for jack:
:: Repository extra
   1) jack2  2) pipewire-jack

Enter a number (default=1): 2
:: There are 2 providers available for qt6-multimedia-backend:
:: Repository extra
   1) qt6-multimedia-ffmpeg  2) qt6-multimedia-gstreamer

Enter a number (default=1): 1
:: There are 128 providers available for tessdata:
:: Repository extra
   1) tesseract-data-afr  2) tesseract-data-amh  ... 30) tesseract-data-eng

Enter a number (default=1): 30
|
Used yay for AUR packages:
1
2
3
4
|
mkdir ~/tmp && cd ~/tmp
sudo pacman -S --needed git base-devel && git clone https://aur.archlinux.org/yay-bin.git && cd yay-bin && makepkg -si
cd -
yay -S --needed - < arch_home_pkglist-aur.txt
|
Enabled services for audio:
1
2
|
systemctl --user daemon-reload
systemctl --user enable --now pipewire.service wireplumber.service
|
Installed mise packages:
1
2
3
|
mise trust
curl https://mise.run | sh
mise install
|
Launched neovim once to let lazy.nvim do its thing:
I wanted to be taken directly into Hyprland session upon login, so I set up SDDM autologin:
1
2
3
4
5
6
|
sudo mkdir -p /etc/sddm.conf.d
sudo cat /etc/sddm.conf.d/autologin.conf <<EOF
[Autologin]
User=jy
Session=hyprland
EOF
|
Finally, rebooted and confirmed everything was working fine.
Conclusion
Although I’ve installed Arch a few times by now, there were still some steps I could mess up, and I was constantly looking things up as I went. That is why I decided to document the entire process this time for future reference.
It was quite fun to forge a Windows laptop into a Linux machine, and I’m so ready to take off to my New Year vacation with it.