Up until now, all my transcoding jobs were done on the CPUs of the SFF Optiplices (index -> indices, Optiplex -> Optiplices) in my cluster. They get the job done, but the performance is not great to say the least. Sometimes they just straight up run into OOM.
To put an end to this, I built a new machine with an NVIDIA GPU to use for hardware-accelerated transcoding. The plan was to “just” passthrough the GPU to a k3s worker VM on Proxmox and tweak the transcoding jobs to use the GPU, but that was easier said than done as I later found out…
Environment
Cluster
Hypervisor: Proxmox VE 8.4.1
Kubernetes: v1.32.6+k3s1
Machine to be added
CPU: AMD Ryzen 7 5700X
GPU: NVIDIA GeForce RTX 5060
Motherboard: ASRock B550M PRO4
I found a good deal on the CPU on eBay, so I decided to go with the previous gen AM4 socket. The motherboard was specifically chosen for the mATX form factor and the ability to fit in both the GPU and a 10Gb network card. It was surprisingly hard to find a mATX board that had a chipset PCIe x8-16 slot in addition to the x16 slot for the GPU.
Install Proxmox
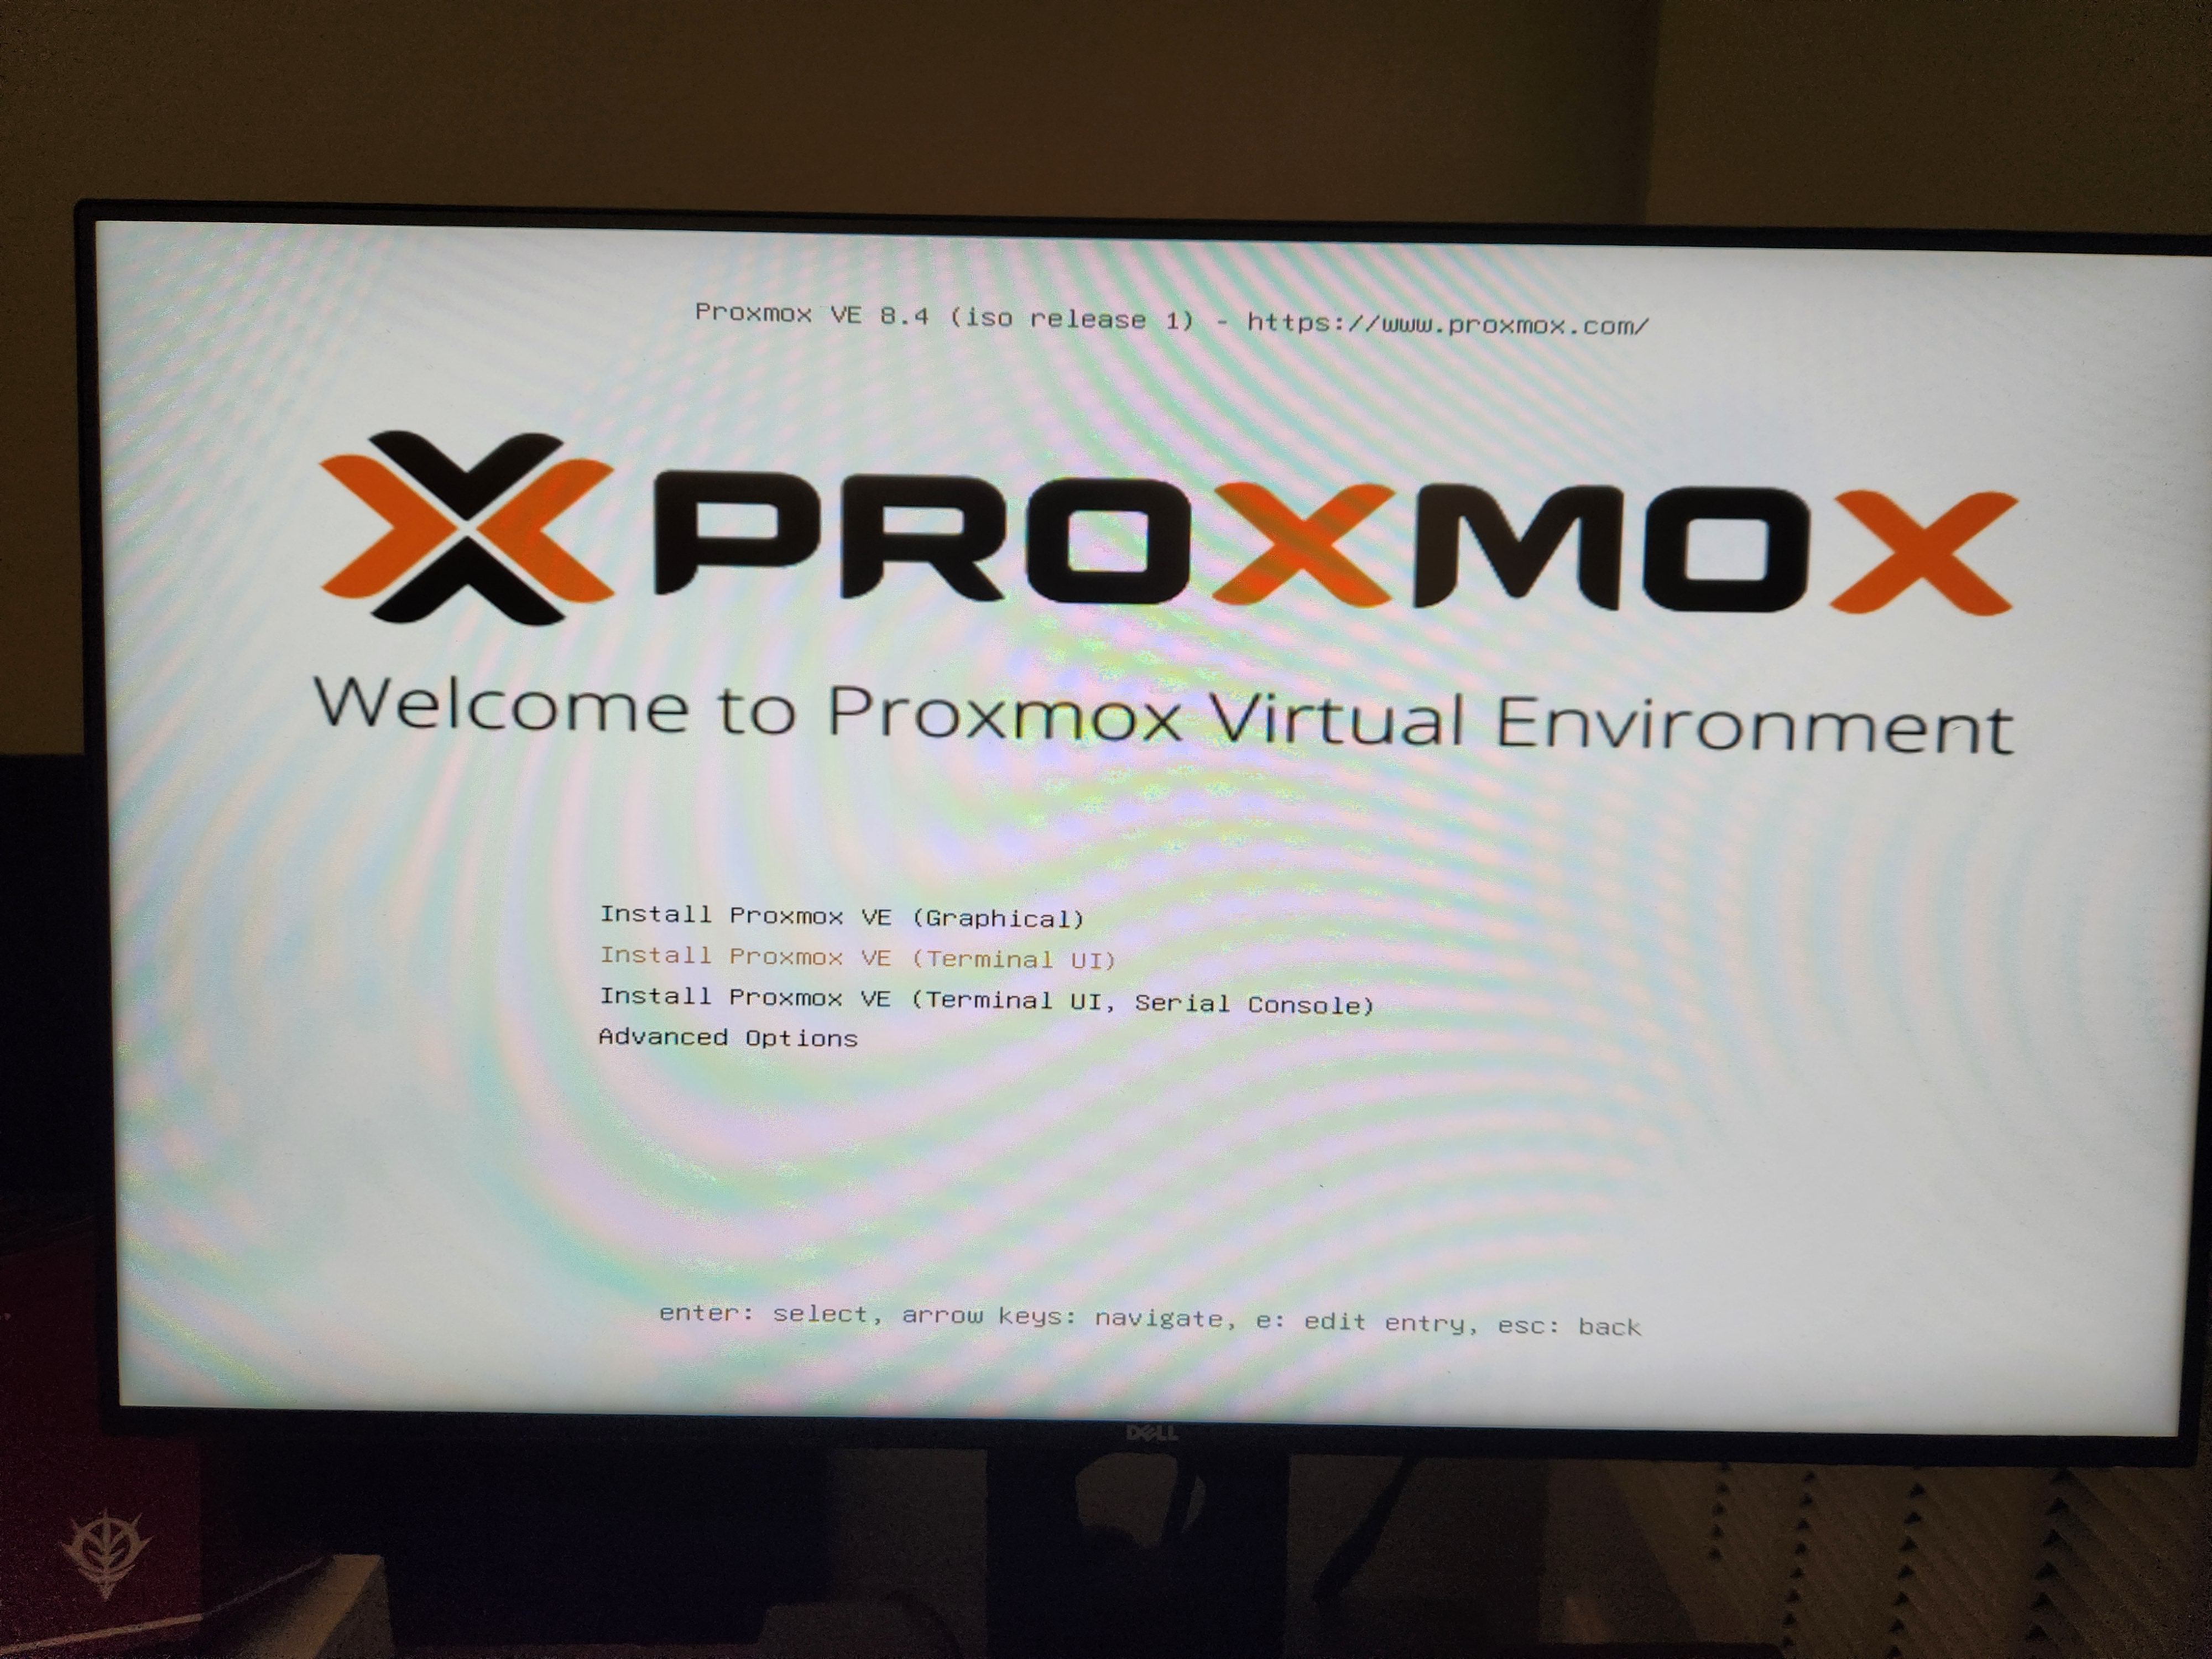
As always, I started with plugging in my trusty Proxmox installer USB drive, booted into it, and clicked on “Install Proxmox VE (Graphical)”…
Only to be greeted with a blank screen. That’s always exciting.

I tried “Terminal UI” and “Serial Console”, but nothing seemed to work.
After some serious prompt engineering, I finally understood what was happening. The installer was trying to use the NVIDIA GPU for the display, but it requires drivers to do so, which obviously I didn’t have yet.
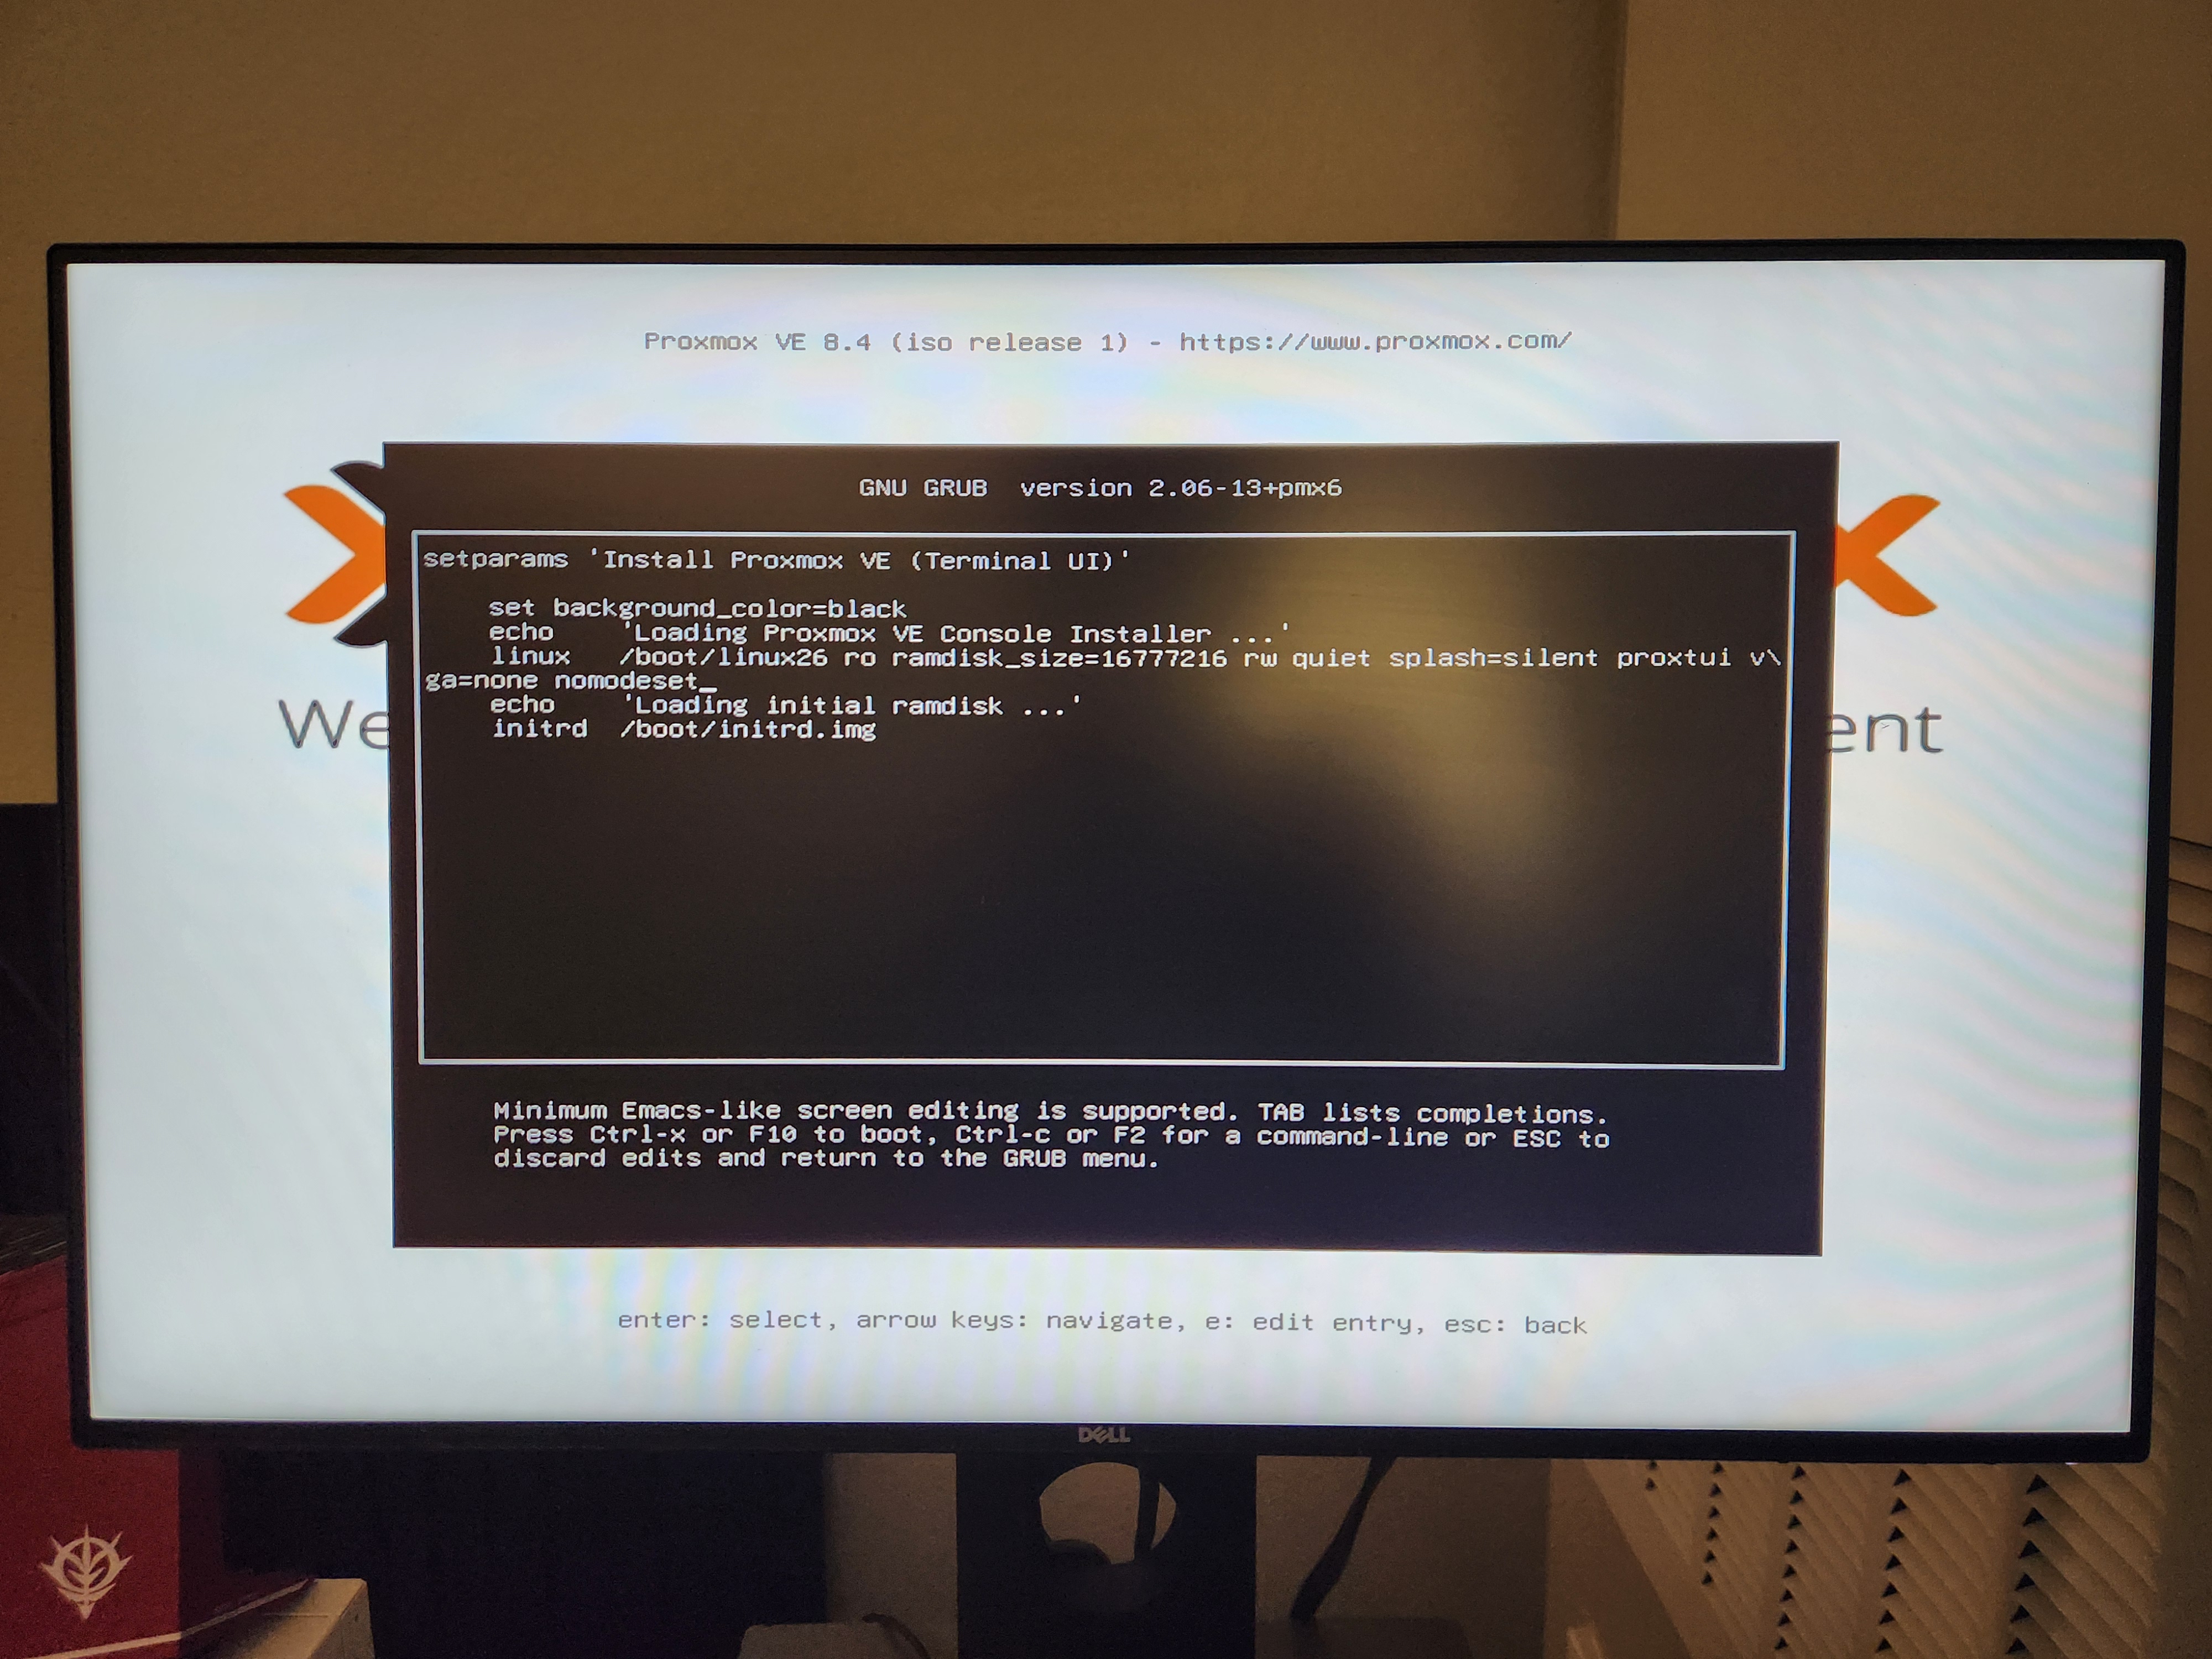
Usually at this point we can unplug the GPU and use the iGPU on the CPU to overcome this issue. However, the Ryzen 7 5700X does not have an iGPU, so instead I persuaded the installer to not worry about the GPU drivers by adding the following to the GRUB command line:
|
|
vga=none: tells the kernel not to set any framebuffer graphics mode, displaying in text mode insteadnomodeset: prevents the kernel from loading video drivers and using them to set the display resolution
This is done by pressing e on the GRUB menu focusing on the “Install Proxmox VE (Terminal UI)” option,
and adding the above parameters to the end of the line starting with linux, then pressing Ctrl+X to boot.
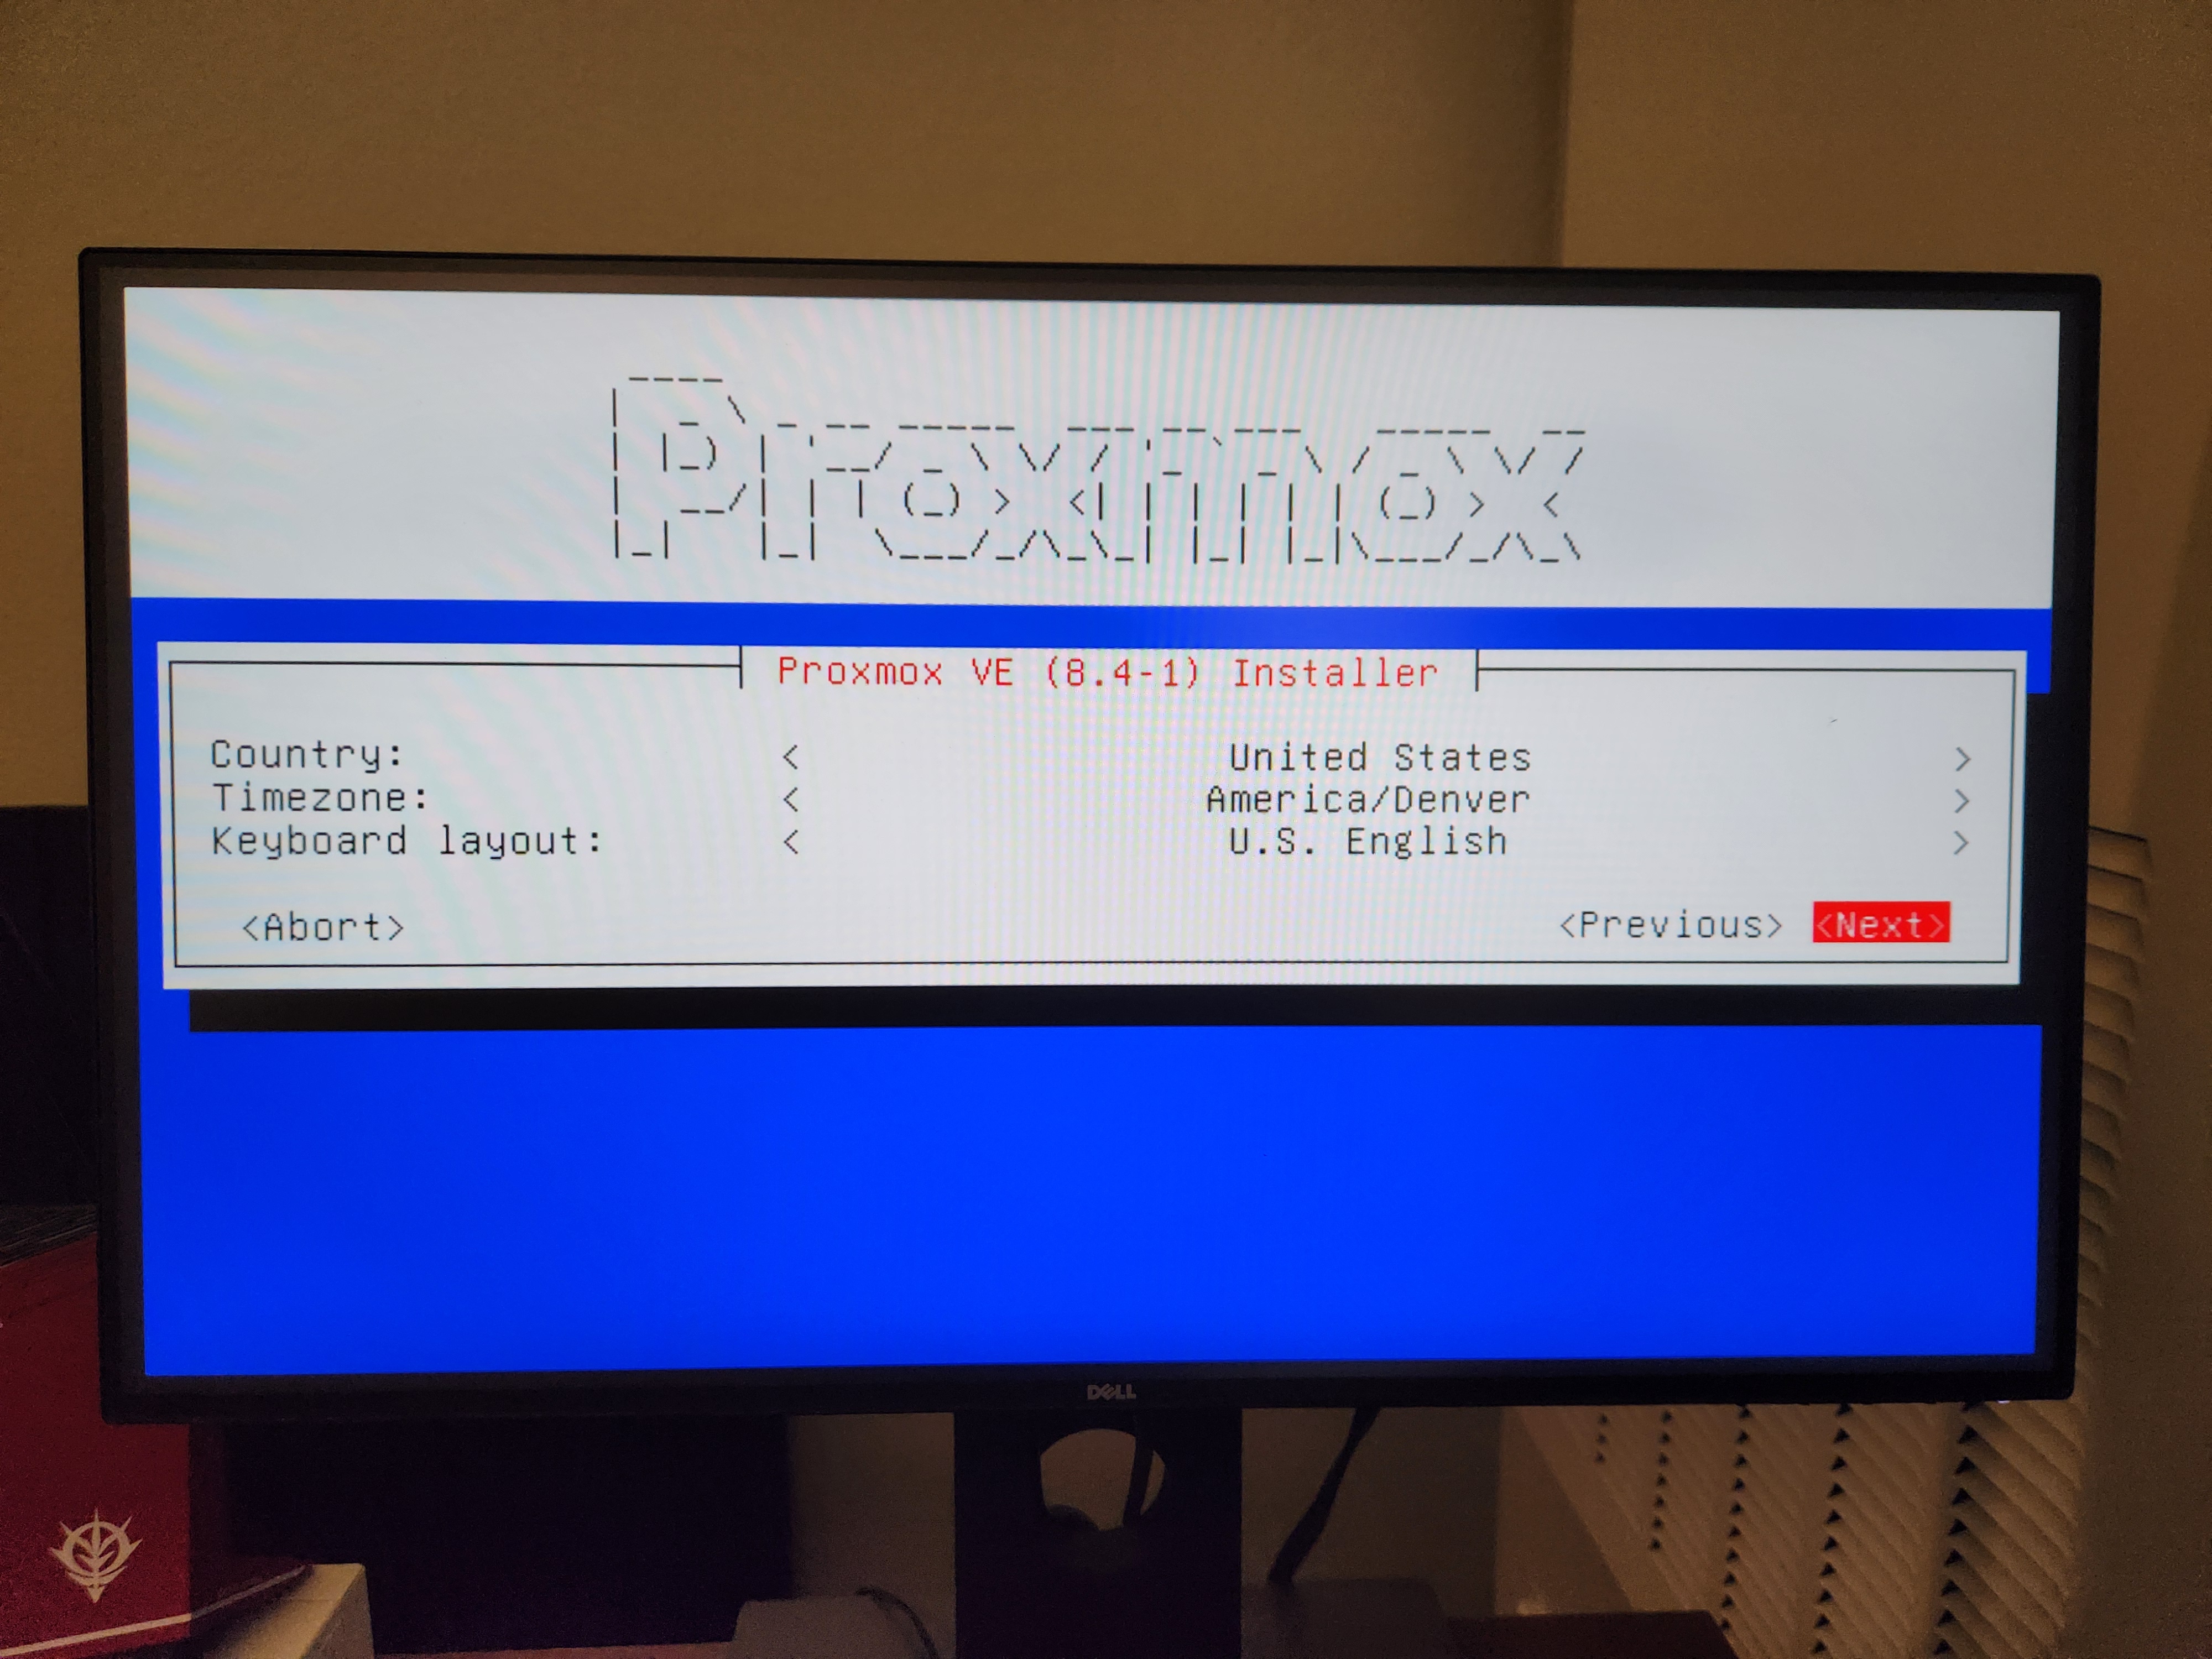
Look at that beauty.
Configure host machine
After introducing amd01 to its Optiplex friends,

it’s time to make it useful by taking away its GPU.
The 5060 would definitely feel more sense of fulfillment serving various unforeseen jobs I throw at it in the kubernetes cluster, rather than occasionally spitting out some ASCII letters when I decide to plug in a DisplayPort cable.
Enable IOMMU
In computing, an input–output memory management unit (IOMMU) is a memory management unit (MMU) connecting a direct-memory-access–capable (DMA-capable) I/O bus to the main memory. Like a traditional MMU, which translates CPU-visible virtual addresses to physical addresses, the IOMMU maps device-visible virtual addresses (also called device addresses or memory mapped I/O addresses in this context) to physical addresses. Some units also provide memory protection from faulty or malicious devices.
- Wikipedia: Input–output memory management unit
As I understand it, IOMMU is a hardware feature that allows memory alignment between VMs and PCIe devices. Without it, the VM cannot access the GPU memory directly.
Take a VM running video transcoding as an example.
- VM sends a command to the GPU to start transcoding
- The GPU reads a raw packet from RAM
- The GPU writes the transcoded packet to RAM
- VM reads the transcoded packet from RAM
If IOMMU is not enabled, memory addresses in the VM and the GPU do not match, so GPU will not be able to read the packet from the correct address of RAM at step 2. The same thing happens at step 4 when VM tries to read the transcoded packet from RAM.
Disclaimer: Don’t quote me, I just learned about it today from some reddit posts and ChatGPT.
There are two steps to enabling IOMMU:
- Enable it in the kernel
- Enable it in the BIOS
At some point in the following steps the host machine loses access to the GPU, so I did everything over SSH from here.
Enable in kernel
The kernel parameters go into this file:
|
|
replace GRUB_CMDLINE_LINUX_DEFAULT with:
|
|
When done, update GRUB.
|
|
Then I also added some kernel modules that are required for VMs to utilize IOMMU.
|
|
content:
|
|
Enable in BIOS
With the kernel parameters and modules configured, I rebooted the machine into BIOS.
I had just one mission here, to enable IOMMU.
For ASRock B550M PRO4, the option was under “Advanced” -> “AMD CBS” -> “NBIO Common Options” -> “IOMMU”.
Save and reboot.
Isolate IOMMU group for GPU
With IOMMU enabled, lspci showed IOMMU groups for each PCIe device.
|
|
Relevant devices:
|
|
Now verify that the GPU and its sound card are in the same IOMMU group, and no other devices are in that group.
|
|
Output:
|
|
In my case, the other two devices were bridges, which ChatGPT said was fine, so I proceeded.
|
|
No more GPU for the host
To make sure the host does not use the GPU, I blacklisted the NVIDIA drivers. I haven’t installed any drivers on the host, but just being extra safe here.
|
|
Content:
|
|
Then applied this black magic:
|
|
I had no clue, but ChatGPT told me
You’re essentially telling the Linux kernel to bind your GPU (and its audio function) to the vfio-pci driver instead of the native GPU driver (like amdgpu or nvidia).
Which made sense to me, so I rebooted to proceed.
Launch VM
Now it’s time to create the VM to harness the power of the passed-through GPU.
I used Ubuntu 24.04.3 LTS Server for the disk image, since it was officially supported by NVIDIA drivers.
From what I read, the following options are required:
- Machine type: q35
- BIOS: OVMF (UEFI)
- No memory ballooning
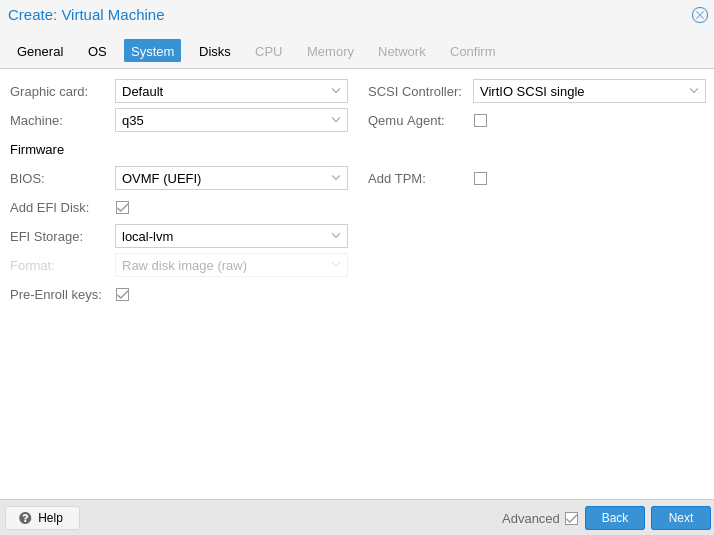
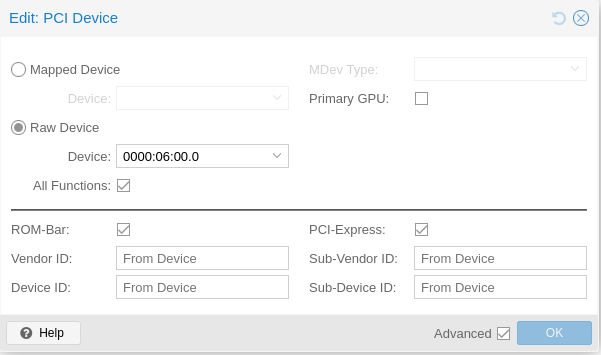
Before launching it, I also added the PCIe passthrough.
Now it’s finally time to launch it - not into the system, but into the BIOS.
Here, again, we only have one mission: disable secure boot.
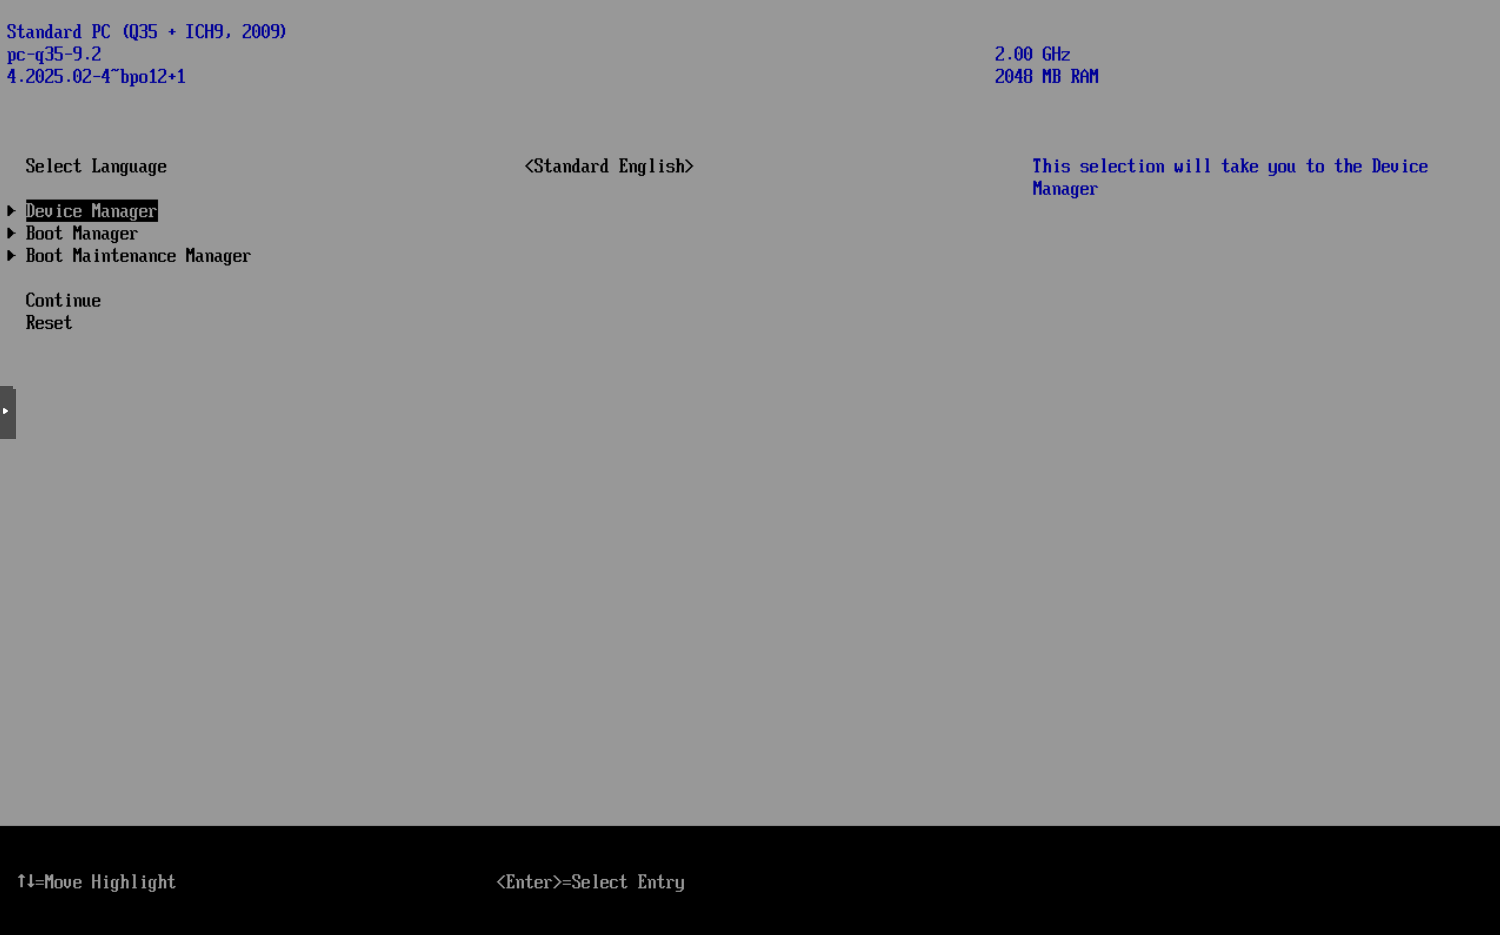
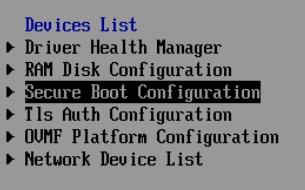

Make sure the check box is unchecked, then save and reboot.
Install NVIDIA drivers
According to the docs, the helm chart can do the driver installation for you, but it requires that “All worker nodes or node groups to run GPU workloads in the Kubernetes cluster must run the same operating system version to use the NVIDIA GPU Driver container.”
I could smell the issues I would run into by doing this, especially with me managing all the VMs, so I went with the manual installation.
Although I ran into some problems because of some human errors I’d rather not discuss here, following the official guide worked out for me:
|
|
Beautiful sight, after some human errors I’d rather not discuss here.
|
|
Not sure if it’s necessary, but I rebooted here.
Human errors aside, now it’s time to move on to the last piece of the puzzle:
Install NVIDIA GPU Operator
NVIDIA has a convenient helm chart for installing the GPU Operator, and a pretty straightforward guide on how to use it: Installing the NVIDIA GPU Operator.
I just added the helm chart using ArgoCD:
|
|
The pods refused to start at first, but then I learned that the CONTAINERD_CONFIG and CONTAINERD_SOCKET environment variables were required for this to work with k3s, thanks to UntouchedWagons/K3S-NVidia.
I also used the time slicing configuration from the same repo, which allows multiple pods to share the GPU.
|
|
Make sure to double-check the configmap exists and is created in the right namespace, in my case it was nvidia. Otherwise the nvidia-device-plugin-daemonset will be stuck at ContainerCreating (Don’t ask me how I know).
After confirming everything in the nvidia namespace was running, I ran a quick test:
|
|
and sure enough, it worked:
|
|
Conclusion
This was definitely one of the more complex setups I’ve done. There were multiple steps that I wasn’t sure if they were going to work, like setting up PCIe passthrough without an alternate GPU, installing NVIDIA drivers on a VM, and configuring the GPU Operator to work with k3s.
Next, I will try to do some transcoding with this setup.
Many thanks to all the resources I found online.
References
Official guides:
Troubleshooting:
