I’ve spent 2 weeks with the Keyball61 by now, so here are my current keymap and some thoughts behind it.
My keymap is available here: vim enjoyer. As the name suggests, the keymap is tailored for vim users.
Keymap breakdown
Layer 0 - the vim layer
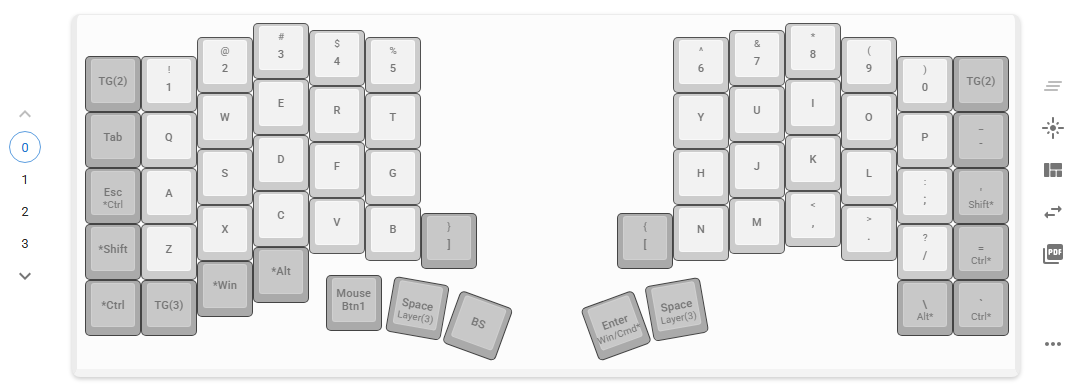
As a normal keyboard user, I have all the alphanumeric characters and modifier keys on this layer. I have put everything needed in vim on this layer.
Some unusual key placements:
- Esc: Since I use vim, I put it in a more accessible position. Who needs caps lock anyway?
- Enter: Since I wanted to fit every punctuation key on this layer, there was no space left for enter on the far right column. So it was a compromise to put it on the right thumb. After a while it feels natural.
- BS: For the same reason, it ended up on the left thumb.
- Space: A lot of people claim they don’t need two space bars on a split keyboard, but I’m just too used to having them…
- [ and ]: People tend to put these in the reverse positions for this kind of keyboard, but I found that to be inconvenient when entering copy mode in tmux. This way, it is arguably less intuitive at first, but I believe it will help me move faster in the long run.
Layer 3 - the non-vim layer
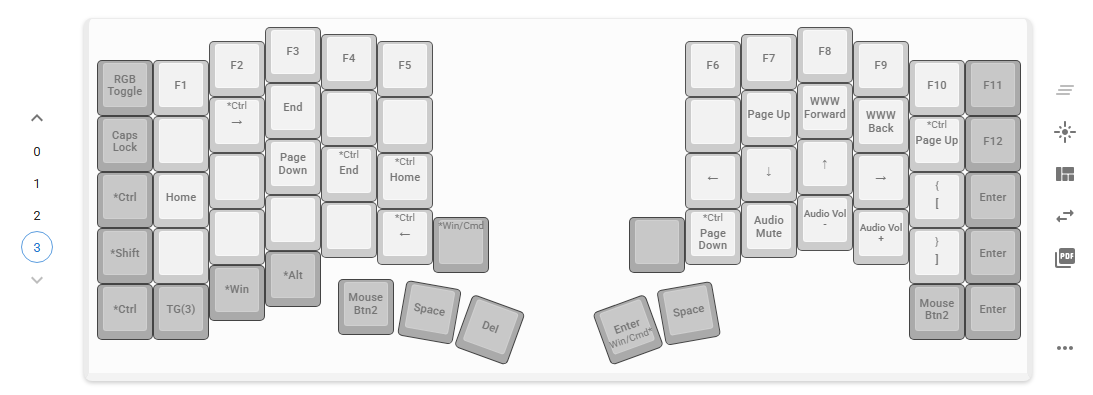
This layer is mainly for when I have to leave vim :( It has all the utilities like page up/down, home/end, arrow keys, and function keys.
I tried to make it as intuitive as possible for vim, less/more, and bash users.
Highlights:
- Arrow keys:
hjklas in vim normal mode - Page up/down:
uanddas in less/more - Home/End:
aandeas in bash emacs mode (when ctrl is held) - Ctrl left/right:
bandwas in vim normal mode - WWW Back and Forward:
oandias in vim normal mode
The reason all these are on layer 3 instead of 2 is that the trackball’s scroll mode is enabled on this layer. I wanted to put scrolling on the same layer as all the utility keys.
Layer 2 - the mouse layer
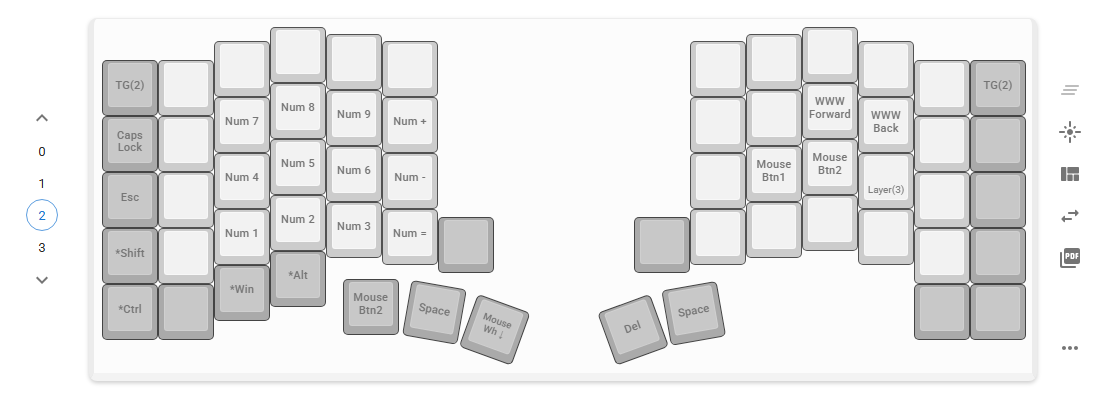
This is where vim becomes irrelevant. Layer 2 is dedicated to mouse actions and numpad. It was first designed for using the mouse with one hand, since layer 1 and 3 both require two hands to operate the mouse.
The only design philosophy here is to make everything reachable with one hand.
How I got here
As a vim user who doesn’t want to leave the home row, this board felt like the answer.
A little historical background
At the end of 2023, I started using vim with an HHKB Professional HYBRID Type-S, which I got as a Christmas gift from my dad (who is also a software engineer!).
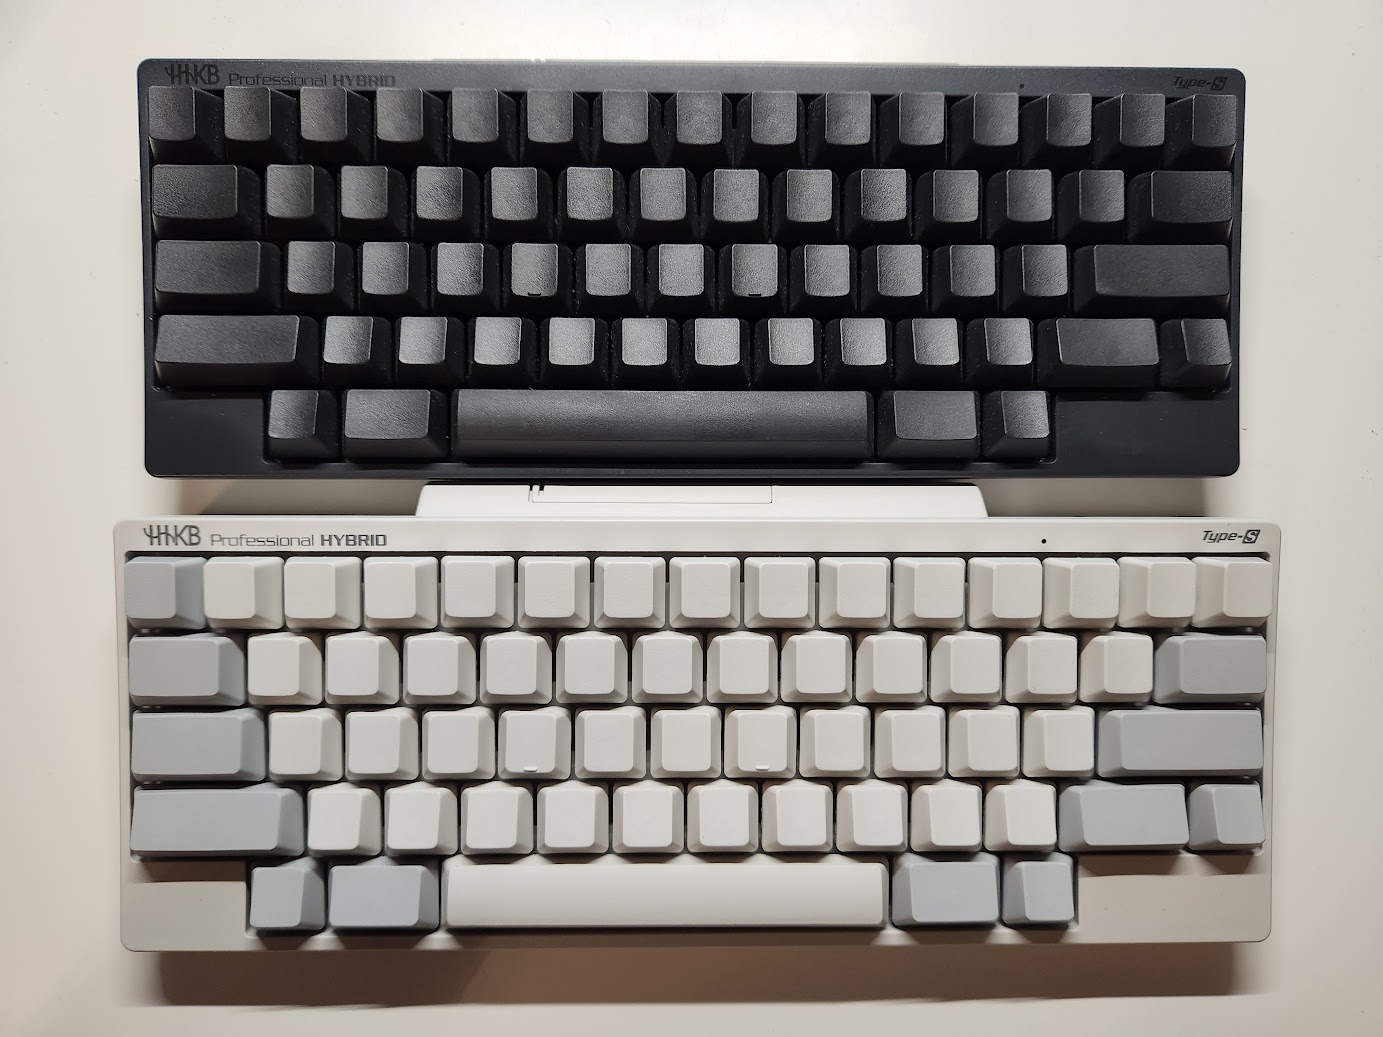
For one year, I was very happy with it, that I bought one for home and another for work. It was the first time I had the feeling that every key I needed was within reach from the home row.
As I grew more and more accustomed to vim and the terminal, though, a new frustration had emerged: the necessity of a mouse. Even though I had optimized my keyboard to my workflow, whenever I had to use the mouse, I had to move my right hand a few miles away from the home row.
I tried to overcome this problem by using various plugins for different applications. For example, Tridactyl for Firefox and the built-in vim mode for Obsidian. However, both at home and at work, there were still many occasions I had to use the mouse a lot. Essentially, I could decrease the use of the mouse, but I couldn’t eliminate it (not without sacrificing productivity).
Then I chagned the way of my thinking: instead of trying to eliminate the mouse, why not make it more accessible? I remembered seeing the HHKB Studio some time ago, and thought the integrated trackpoint might be the answer.
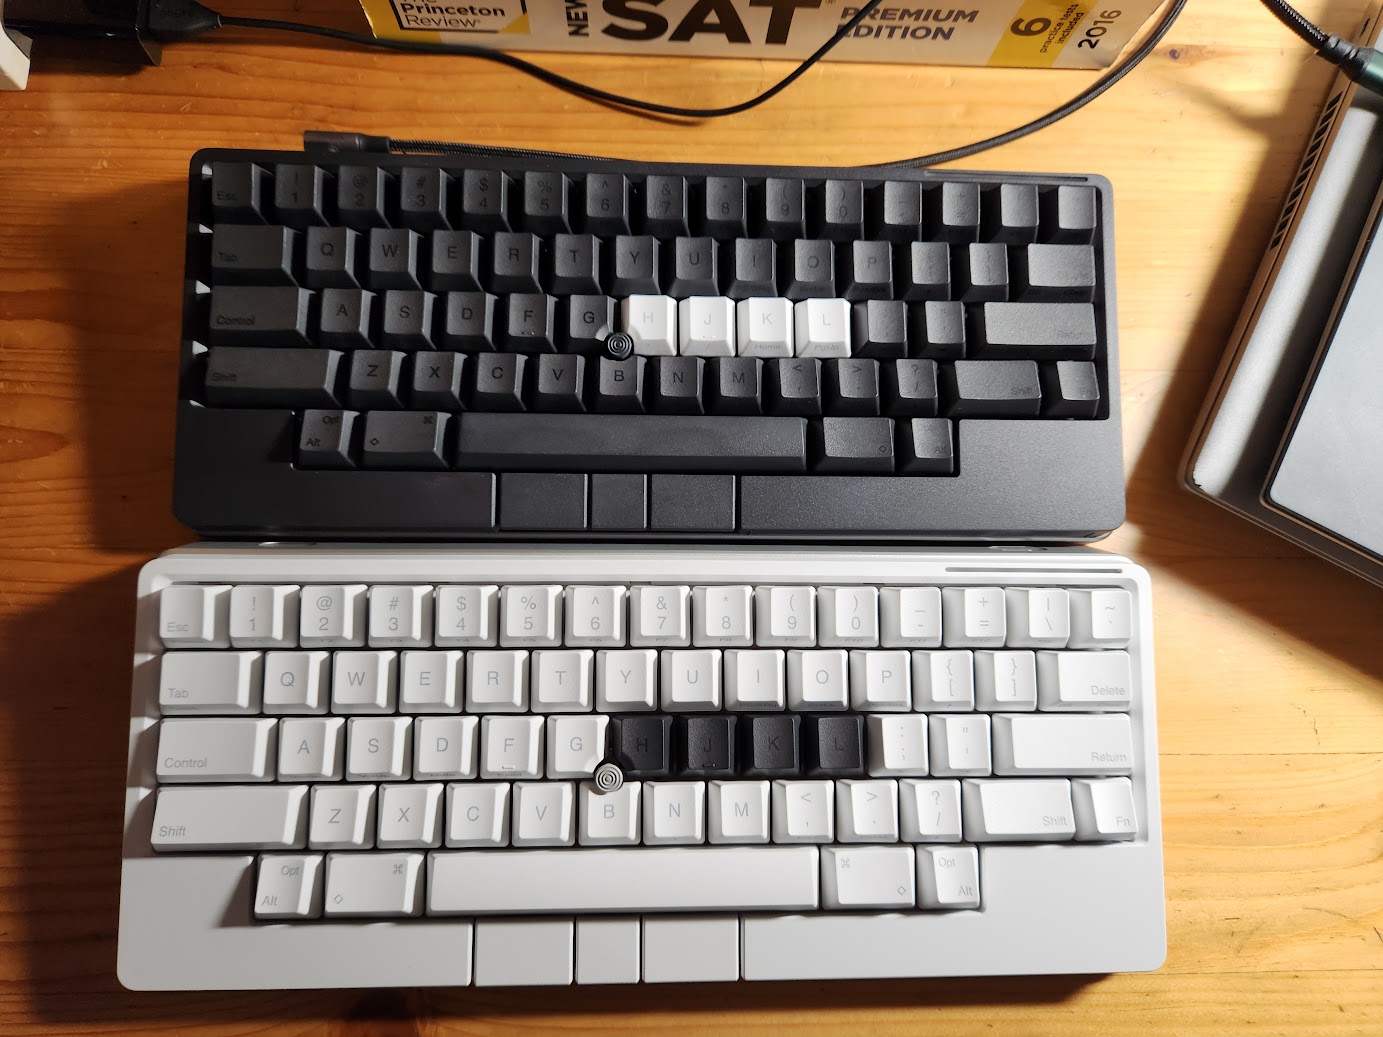
Seeing some positive opinions about trackpoints on the internet (some people claim to be able to replace the mouse entirely with it), I decided to give it a try. Convinced that I could make it work, I even bought two of them. Again, one for home and one for work.
After one month, though, I had realized that this was not the solution, at least for me. Although I could maneuver the trackpoint precisely enough for most occasions, I experienced some pain in my fingers and wrist, especially after extended use. I was really happy that I could use the mouse barely moving my hand from the home row, but I knew it could not be this way forever.
I suppose it wouldn’t be so surprising that, at this point, something like Keyball61 would seem very appealing to me.
Keyball61
Somewhere between the HHKB and HHKB Studio, I had also tried to use HHKB with a trackball. Specifically, Kensington’s SlimBlade™ Pro Trackball. Although I eventually switched to HHKB Pro and did not use the trackball from there, the comfort of using that trackball stuck with me.
That led me to searching for keyboards with trackballs, and the next thing I knew, there was a Keyball61 on my desk.
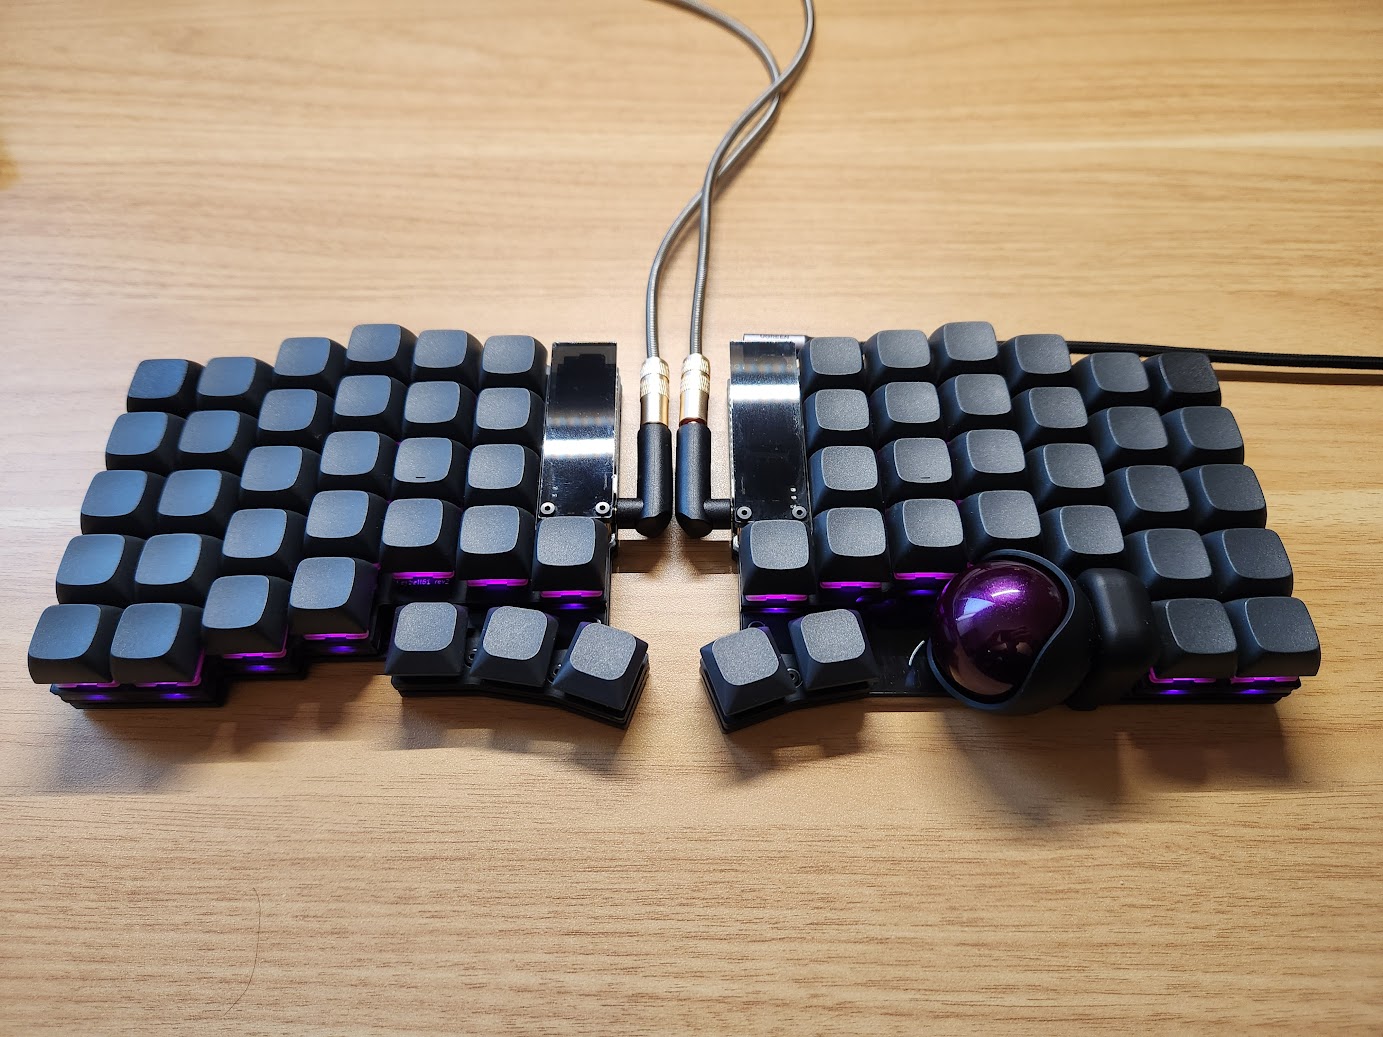
As expected, I grew addicted to it. Partially becauese I forced myself to get used to it, but mostly because it was just so comfortable not having to switch between different input devices at all. Yes, it does take some practice going from a normal row-staggered keyboard like the HHKB to a column-staggered one. I can’t say I’m 100% used to it yet, but I have a feeling it is going to stick.
Things I love about it:
- Trackball: Just so much nicer than a mouse or a trackpoint. The accessibility is unmatched.
- Thumb keys: Your thumbs can do much more than just pressing a enormous space bar.
- Split: This is my first split keyboard, and I must say my shoulders feel much more relaxed than before, as I can keep them at a natural angle.
Things I’m not sure about yet:
- Column stagger: I did have to relearn a lot of my muscle memory. My original WPM was around 100, and it dipped to ~30 when I first tried to type on it. It’s back to ~70 now, but we’ll see if I can reach 100 again.
Things I don’t like:
- Press/hold keys: Keyball allows you to set keys to behave differently when pressed and held. I tried to use it for layer switching and such, but the experience was not very smooth.