GitHub Actions is a convenient way to automate your CI/CD workflow. Personally I’m using it to build and push docker images to Docker Hub for a few of my projects, and in this post I will share a simple example of how to set it up.
Prerequisites
- A GitHub repository with a Dockerfile
- A Docker Hub account (or any other container registry)
If using a different docker registry than Docker Hub, you will need to change the login action in the workflow file.
See docs for more information.
Step 1: Generate a Personal Access Token
For DockerHub,
- Go to Docker Hub and log in.
- Click on your profile icon in the top right corner, then click on
Account Settings. - Click “Personal access tokens”, then “Generate new token”
- Give the token a name like “github”, and give it both
readandwritepermissions.
Step 2: Create a manifest file
Create a new file .github/workflows/docker-build.yml in your repository with the following content:
Here I’m using ${{ secrets.DOCKER_USERNAME }}/blog as an example (it’s this blog). You can replace it with your own repository name.
|
|
This is the file that GitHub Actions will look for to run your workflow. The file name can be anything, but the directory must be .github/workflows/.
In this example, every time a change is pushed to master branch, the action will generate two tags:
releaseYYYYMMDD(the date of the build)
Step 3: Add secrets to your repository
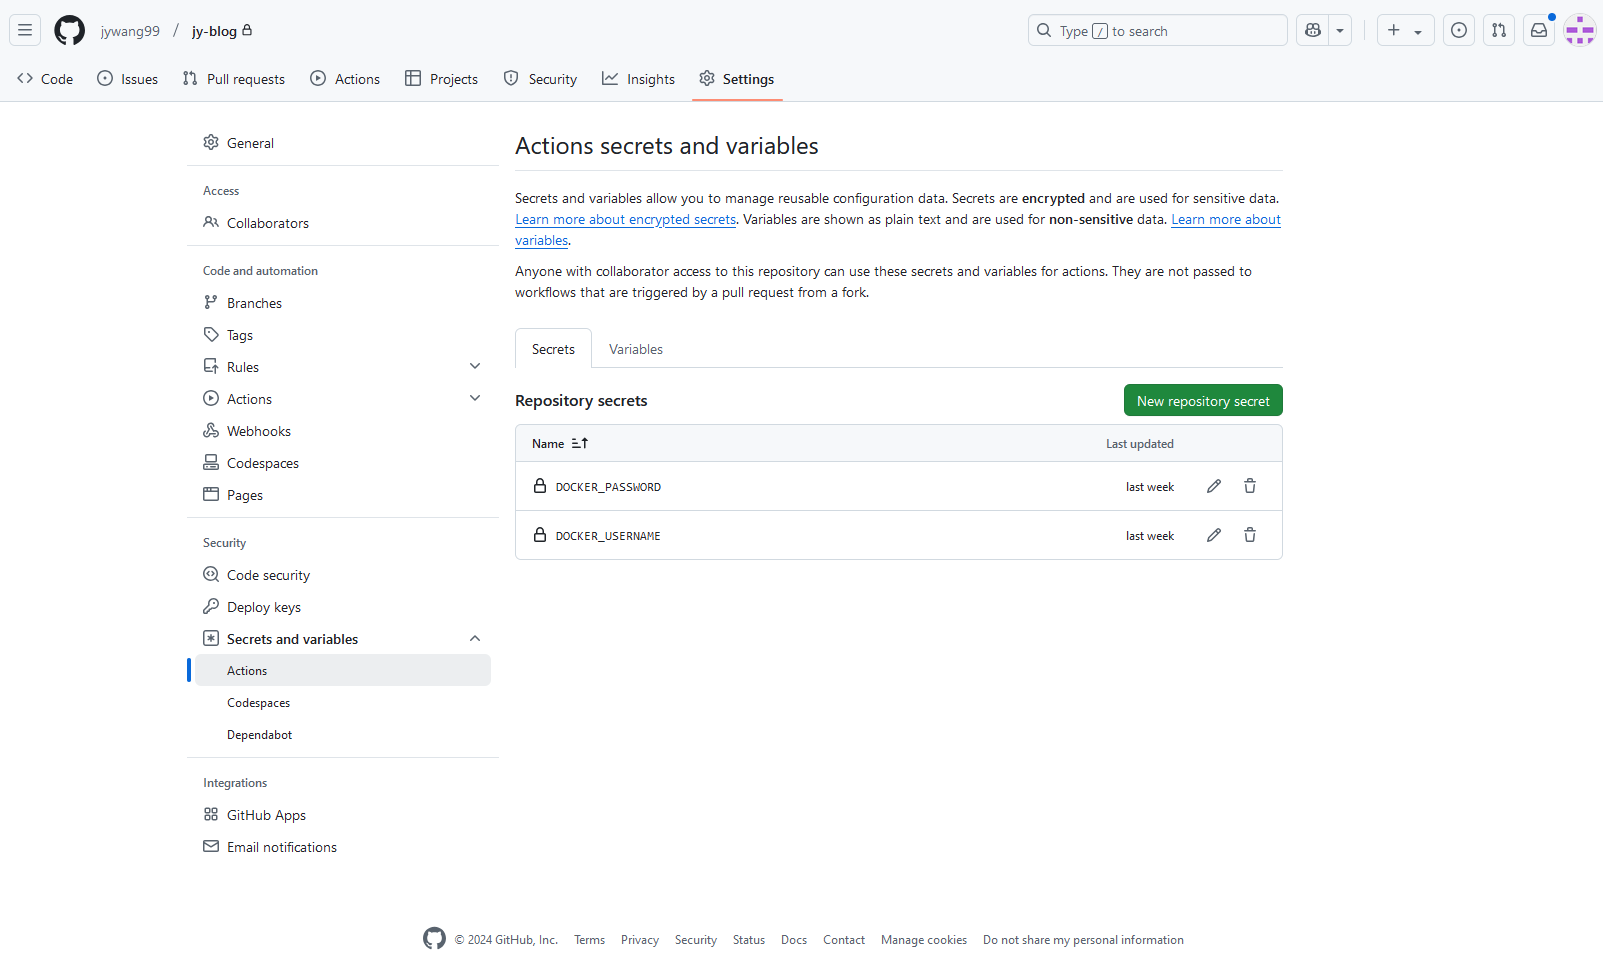
Go to your repository on GitHub, then click on Settings > Secrets > New repository secret.

Then add two secrets as shown in the image:
DOCKER_USERNAME: your Docker Hub usernameDOCKER_PASSWORD: the personal access token you generated in step 1
Step 4: Push your changes
Now it’s time to push your changes to GitHub.
Once you do, you can go to the Actions tab in your repository to see the action “in action”.

That’s it! Now you should see a new docker image being pushed for every change you make to your repository.
